From REDCap Setup to NACC ADRC Portal Upload
Introduction
This guide provides a comprehensive, step-by-step process for Alzheimer’s Disease Research Centers (ADRCs) to set up and submit participant data to the National Alzheimer’s Coordinating Center (NACC) using REDCap.
Using the Participant Enrollment/Transfer Form as the primary example, the guide walks through downloading the REDCap XML template, configuring your local REDCap project, exporting a standardized CSV via the built-in export report, and uploading the file to the NACC ADRC Portal for quality checks and submission.
Overview: Why REDCap?
Using the NACC REDCap XML templates streamlines your center's workflow by eliminating manual database creation.
- Standardization: Replicating the exact CDISC ODM structure ensures your data instantly aligns with NACC's schema.
- Built-in Quality Control (QC): The templates include pre-configured data validation constraints (ranges, field types, and formats) and pre-built Export Reports to guarantee your data exports compiled cleanly.
- Modern Features: Supports ontology lookups (e.g., RxNorm for medication validation in UDSv4), eliminating spelling errors at the point of data entry.
ADRC Step-by-Step Guide
Step 1: Download the Project REDCap XML Template
Before configuring your project, you must acquire the official, validated schema file from NACC.
-
Navigate to the NACC's Electronic Data Capture and Submission Documentation.
-
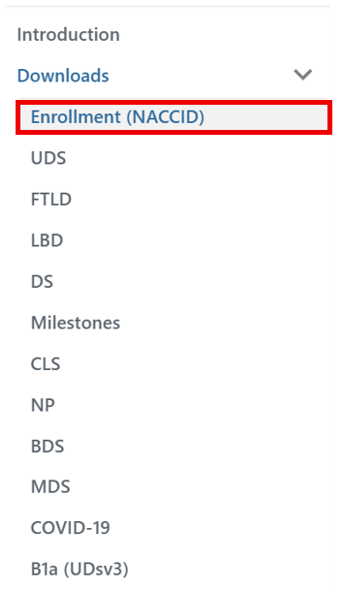
From the left-hand navigation menu, expand the Downloads section and select "Enrollment (NACCID)". This will take you directly to the Participant Enrollment/Transfer Form Downloads page (or navigate to the specific UDSv4 instrument page your center requires).
-
Under the general download links, locate the link labeled REDCap XML (e.g.,
enroll-v1-redcap-xml-04082025.zip).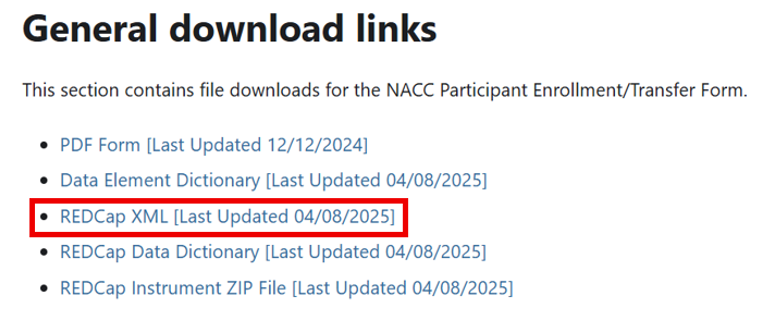
-
Right-click the REDCap XML link and select Save Link As... to download the file directly to your local computer.
If the downloaded file is a compressed archive (.zip), you must unzip/extract it on your computer before uploading. Your local REDCap system requires the raw, uncompressed .xml file (CDISC ODM format) to build the project.
Step 2: Set Up Your Center's REDCap Project
This step creates a brand-new project on your institution's secure local REDCap instance containing all pre-designed NACC instruments, field validation rules, and built-in export reports.

-
Log in to your institution's local REDCap instance.
-
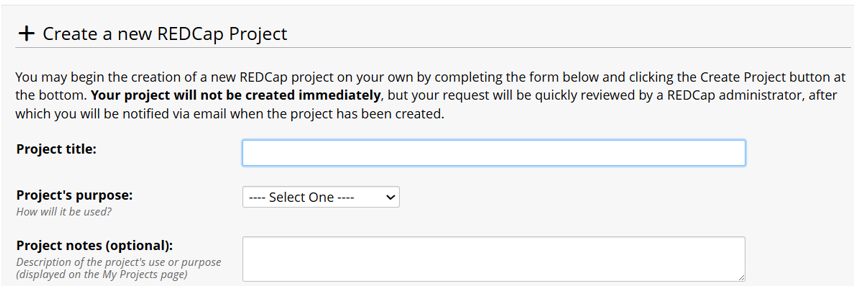
Click the + New Project tab at the top of the home screen to create a new REDCap project.

-
Complete the project metadata fields:
- Project title: e.g.,
NACC Participant Enrollment - [YourCenterName]. - Project's purpose: e.g.,
Research (or Operational Support).
- Project title: e.g.,
-
Under Project creation option, select Upload a REDCap project XML file (CDISC ODM format).

-
Click Choose File, select the .xml file you downloaded in Step 1.

-
Click Send Request (or Create Project, depending on your REDCap instance).

-
What happens next depends on your institution's REDCap configuration. If you click Send Request, your request is routed to a REDCap administrator for approval before the project is created. If you click Create Project, your project is created immediately.

-
Administrator Action (Highly Recommended): If your project handles UDSv4 forms (such as Form A4 for medications), ask your local REDCap System Administrator to Enable BioPortal Ontologies on your instance.
- Why? This links medication entry fields directly to the RxNorm database, providing auto-suggest dropdowns that guarantee clinical terms match national standards before you export.
Step 3: Add Records to Your Project
You may receive an email confirming that your requested REDCap project has been approved and created. In some REDCap instances, the project is created immediately, and no confirmation email is sent; instead, you are taken directly to the Project Home page. Once the project is available, the system is fully ready to begin collecting participant data, including assigning NACCIDs and managing transfers.
-
Click the My Projects tab at the top of the home screen.

-
Select your newly created project (e.g.,
NACC Participant Enrollment).
-
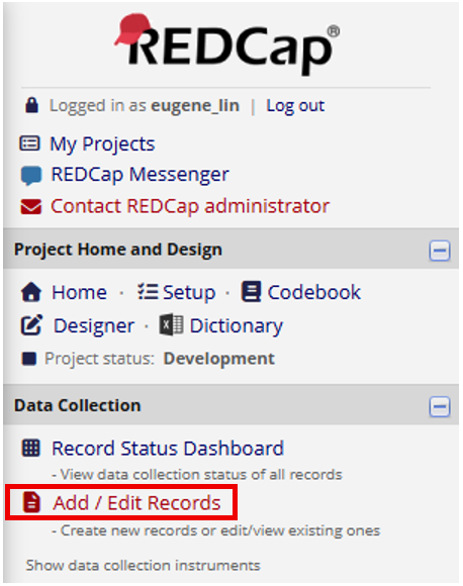
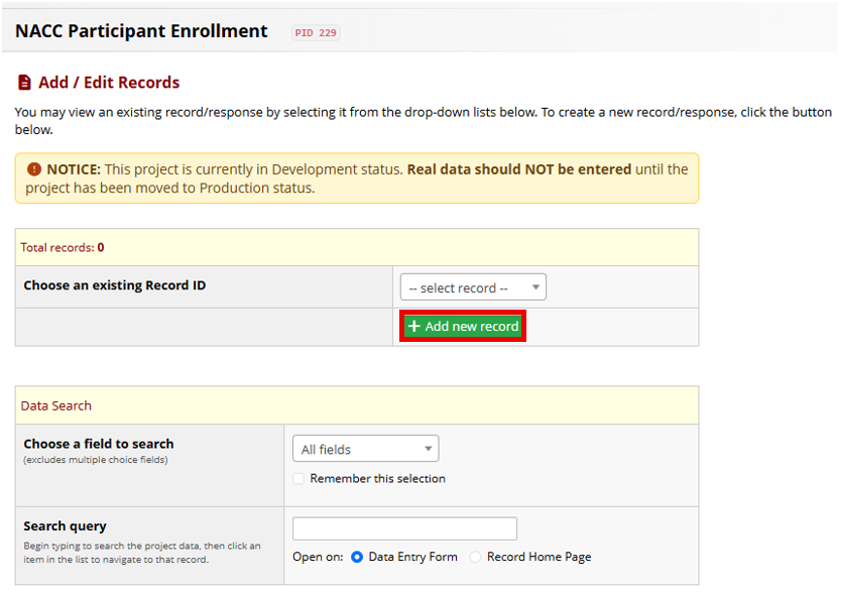
Navigate to Add / Edit Records in the left-hand menu.
-
Click Add new record.
-
Fill out the Participant Enrollment/Transfer Form section by section:
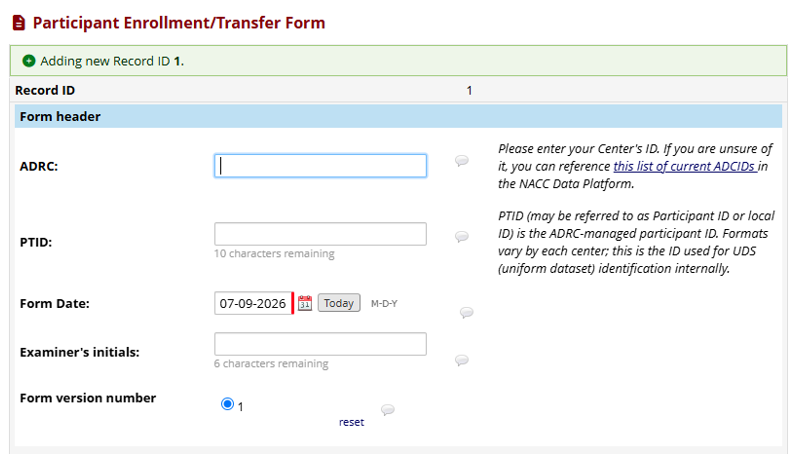
- Form Header Information:
- ADRC: Enter your Center's designated ID (if unsure, reference the ADCID list in the NACC Data Platform).
- PTID: Enter the ADRC-managed participant ID (up to 10 characters). This is your center's internal ID used for UDS identification.
- Form Date: Select or enter the current date (M-D-Y).
- Examiner's Initials: Enter the initials of the examiner (up to 6 characters).
- Form Version Number: Set to 1 (pre-populated by default).
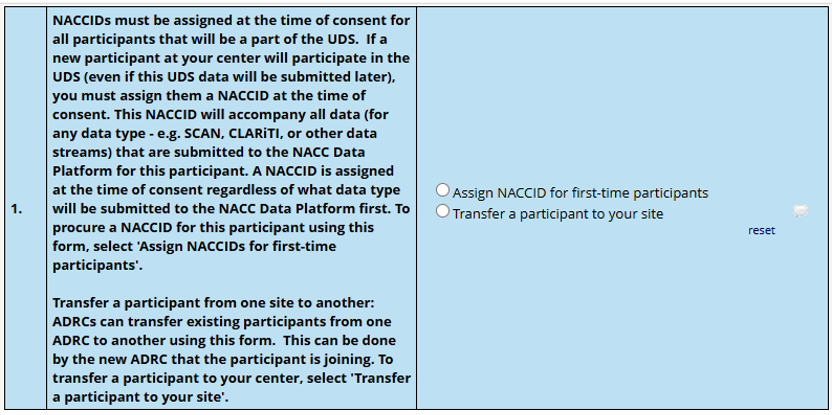
- Section 1: Enrollment/Transfer Type Selection:
- Choose whether you are enrolling a new participant or transferring an existing one:
- Assign NACCID for first-time participants: Select this at the time of consent for any participant who will participate in the UDS. This ensures a NACCID is generated to accompany all subsequent data streams (e.g.,
SCAN, CLARiTI, etc.). - Transfer a participant to your site: Select this if you are transferring an existing longitudinal participant from another ADRC to your center.
- Assign NACCID for first-time participants: Select this at the time of consent for any participant who will participate in the UDS. This ensures a NACCID is generated to accompany all subsequent data streams (e.g.,
- Choose whether you are enrolling a new participant or transferring an existing one:
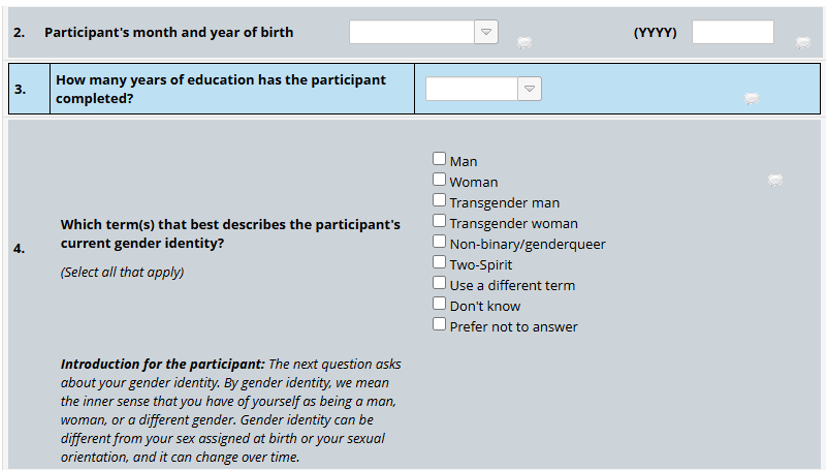
- Sections 2-4: Participant Demographics:
- Participant's Month and Year of Birth: Enter the participant's birth month and year (YYYY).
- Years of Education: Enter the total completed years of education.
- Gender Identity: Select all terms that best describe how the participant currently identifies (e.g.,
Man, Woman, Transgender man, Transgender woman, Non-binary, Two-Spirit, Use a different term, etc.).
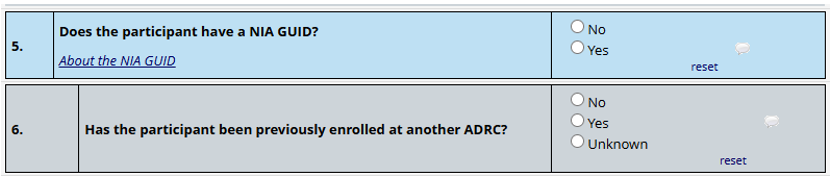
- Sections 5–6: Research Status & Prior Enrollment:
- NIA GUID: Select Yes or No to indicate if the participant has a National Institute on Aging Global Unique Identifier.
- Previously Enrolled: Select Yes, No, or Unknown to indicate if they have been previously enrolled at another ADRC.
- Section 8: PTID Verification:
- Please re-enter the participant PTID before completing the form: Re-enter the exact PTID entered in the Form Header to verify and ensure data accuracy.

- Form Header Information:
-
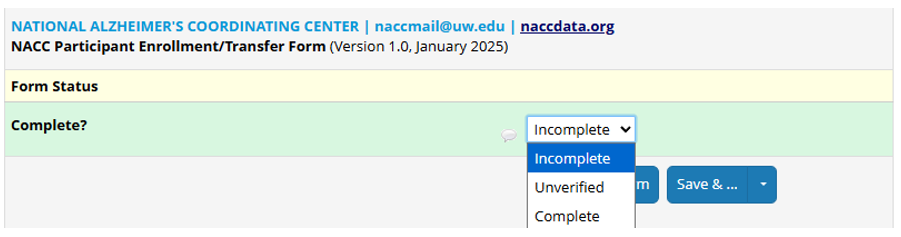
Under Form Status, select the drop-down menu next to Complete? and mark it as Complete (or Incomplete if you need to return to it later).
-
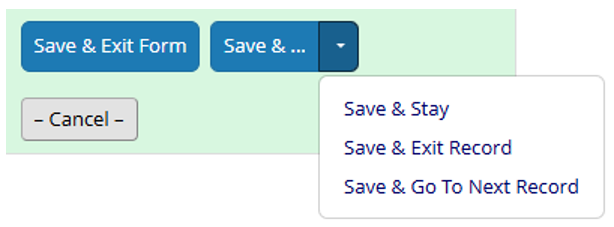
Use one of the save options at the bottom of the page: Save & Exit Form, Save & Stay, Save & Exit Record, or Save & Go To Next Record.
Step 4: Export Data to a CSV Using the Built-In Report
Do not use the standard "Export All Data" button. NACC's XML templates come pre-loaded with a dedicated built-in export report designed to output your columns in the exact sequence NACC's ingestion pipelines expect.

-
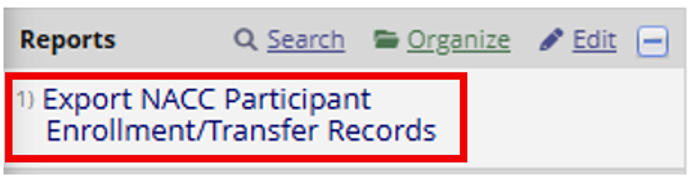
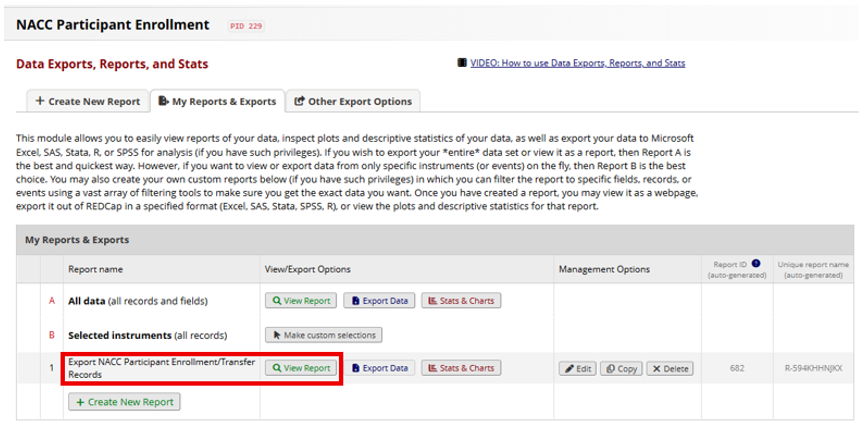
In your REDCap project's left-hand navigation menu, scroll down to the Reports section and click Export NACC Participant Enrollment/Transfer Records.
-
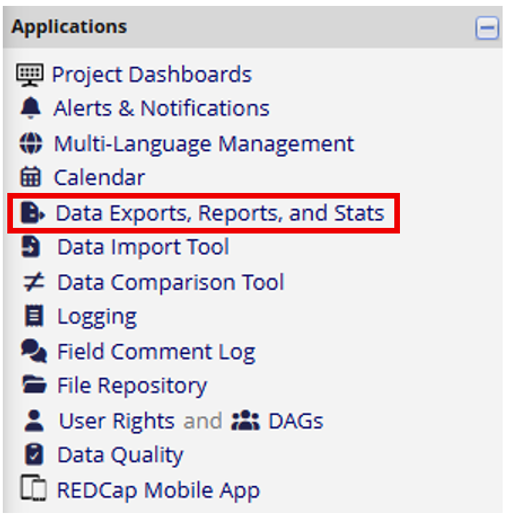
You can also access this report from the Data Exports and Reports page. In your REDCap project's left-hand navigation menu, under the Applications section, click Data Exports, Reports, and Stats. Then locate the custom report titled "Export NACC Participant Enrollment/Transfer Records" (or similar, pre-configured in your template) and click View Report.
-
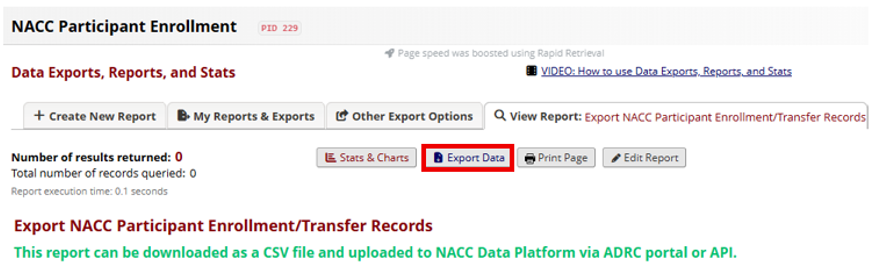
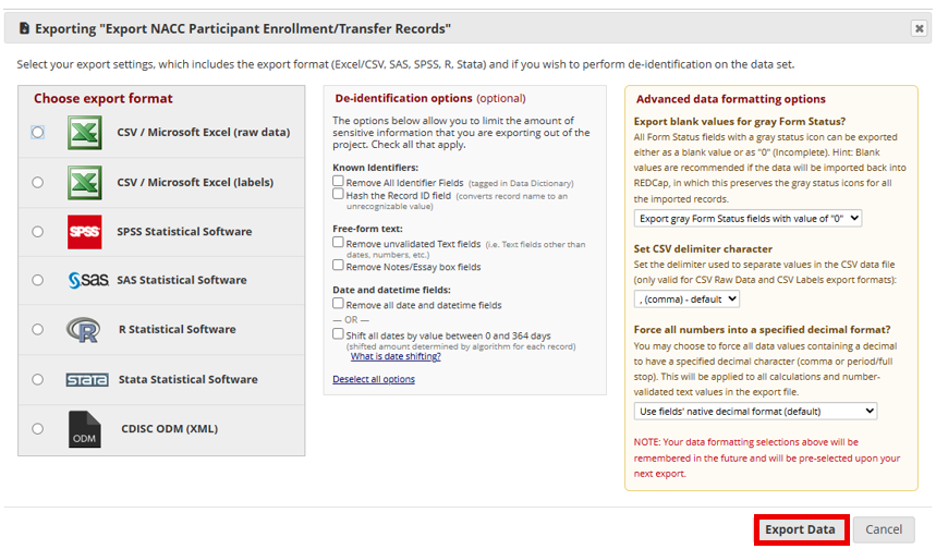
Verify that the correct columns are displayed, then click Export Data at the top of the report.
-
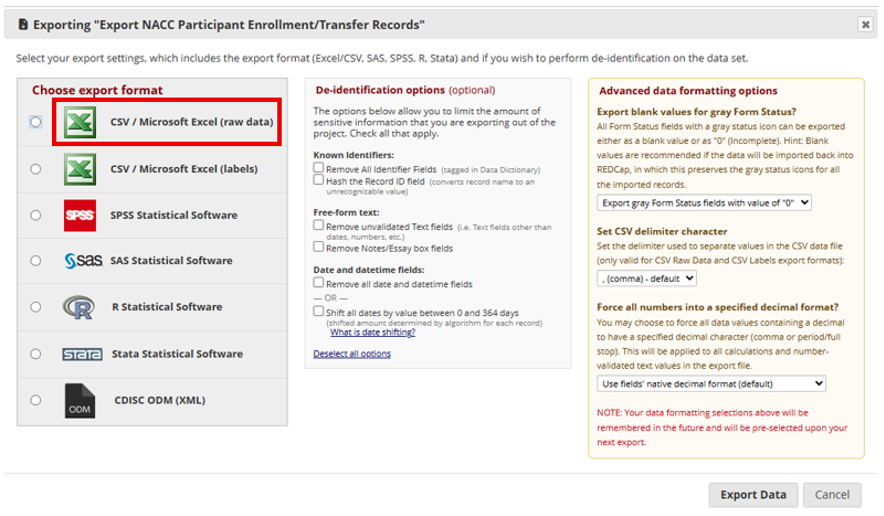
In the export dialogue box, select:
- Format: CSV / Microsoft Excel (raw data). (Do not select "labels"; NACC's automated ingestion system reads raw variable codes).
- CSV delimiter: Leave the De-identification options and Advanced data formatting options unchanged.
-
Click Export Data.
-
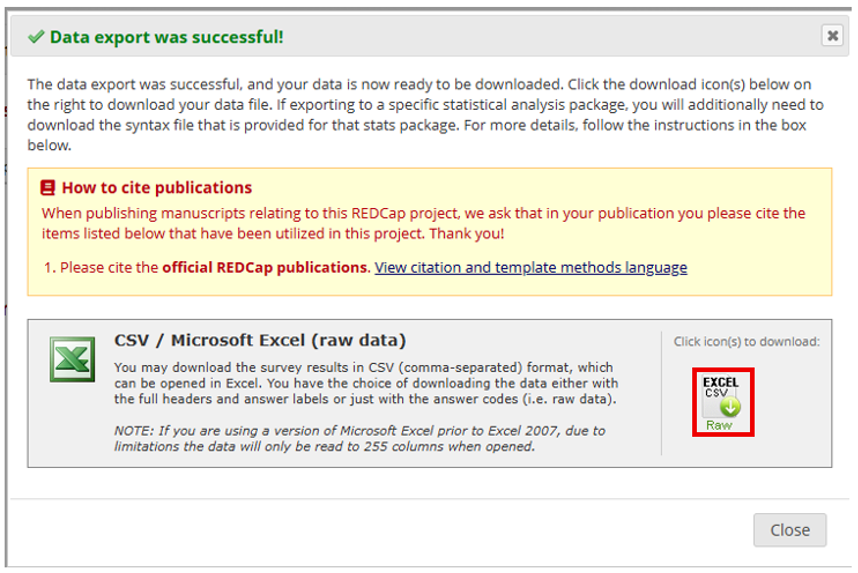
Then click the CSV icon to download the file to your computer.
Step 5: Log In to the ADRC Portal
NACC utilizes a secure, centralized web portal to ingest, validate, and clean participant files. The ADRC Portal serves as a unified hub for centers to upload their local files, as well as access and download harmonized datasets from NACC and affiliated longitudinal studies to support ongoing research and clinical operations.
-
Open your web browser and navigate to the official NACC ADRC Portal.
-
Log in using your designated center credentials (typically secured via multi-factor authentication).
Step 6: Navigate to the Enrollment/Transfer entry point
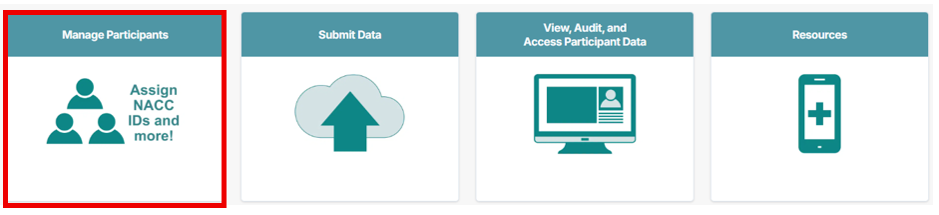
Once logged in, look for the Manage Participants dashboard.
-
Select Manage Participants (Assign NACC IDs and more!). Note that Enrollment is not submitted from Submit Data. Most other forms are submitted from Submit Data, but the Enrollment/Transfer form is submitted from Manage Participants.
-
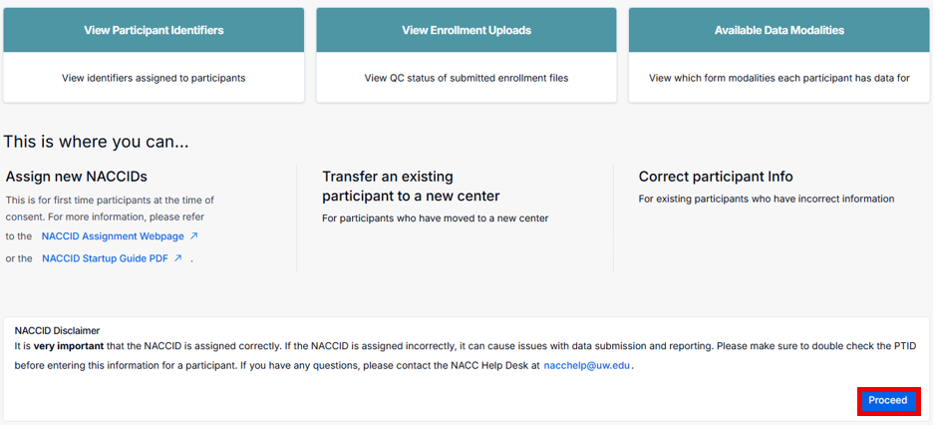
Review the NACCID disclaimer, then click Proceed.
-
Review the Data Submission Options presented.

Step 7: Upload the CSV File
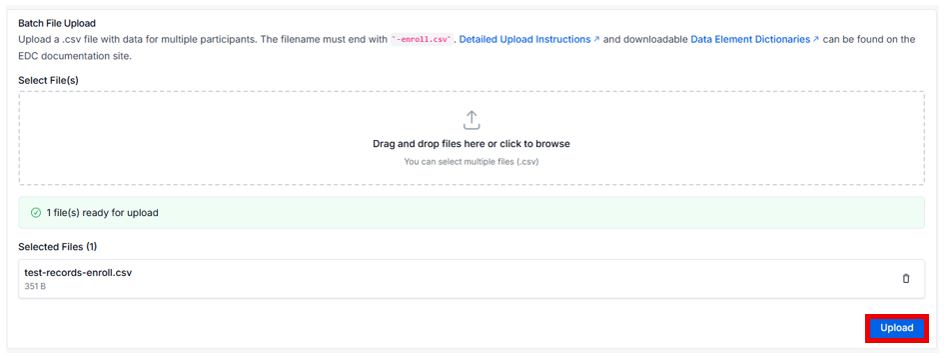
You will now use Batch File Upload to submit one CSV containing one or more enrollment records.
-
From the Data Submission Options, select Batch File Upload.

-
Use a CSV file that you downloaded in Step 4. Ensure your file naming convention is correct: The file name must include the enrollment suffix (
-enroll), for example:test-records-enroll.csv. -
Drag and drop the CSV file into the upload area (or click to browse), then click Upload.
-
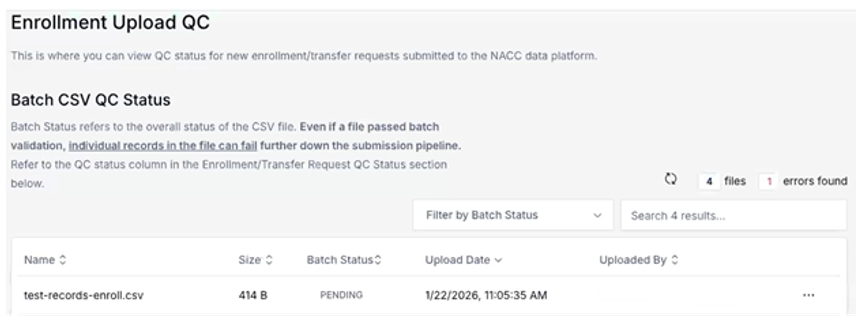
After submission, you will be redirected to the Enrollment Upload QC / Batch CSV QC Status page.
Step 8: Verify QC and Resolve Errors
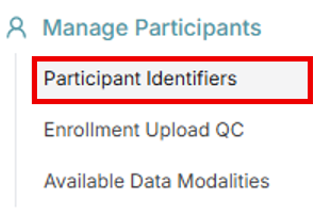
Once the submission passes, use the sidebar menu to go to Manage Participants → Participant Identifiers to view the generated NACCID(s).
-
Viewing results: If a single file contains multiple enrollment records, individual record statuses become visible after the submission clears validation.
-
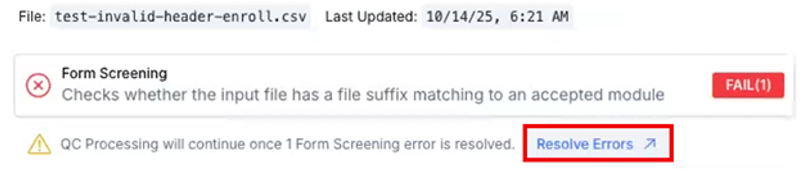
If the upload fails:
- On the Batch CSV QC Status page, click FAIL for the failed submission.
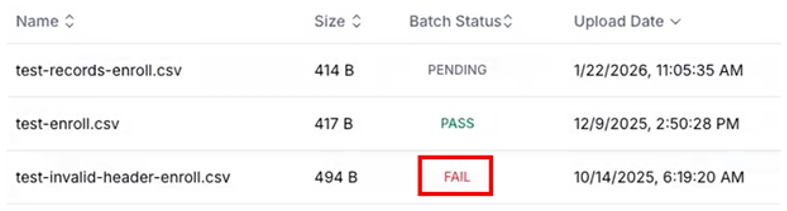
- Click Resolve Errors to view the error report.
- Review errors in the error report.
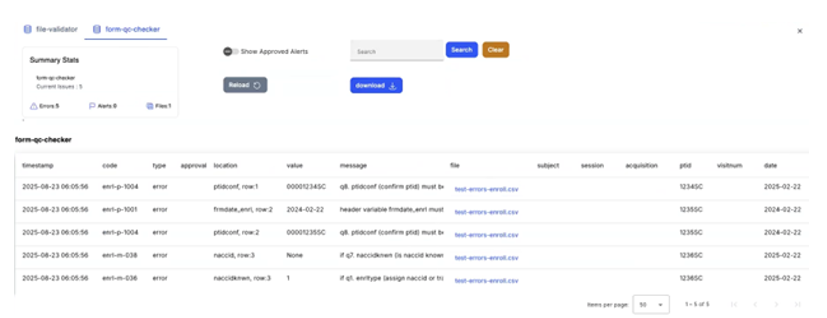
- Correct the CSV and re-upload.