Alert Verification
Some visits will have alerts that need to be manually inspected and approved before the visit can have its submission finalized.
info
Alerts should only be approved after all errors have been corrected, otherwise they will appear again when you resubmit the corrected visit.
Approving Alerts
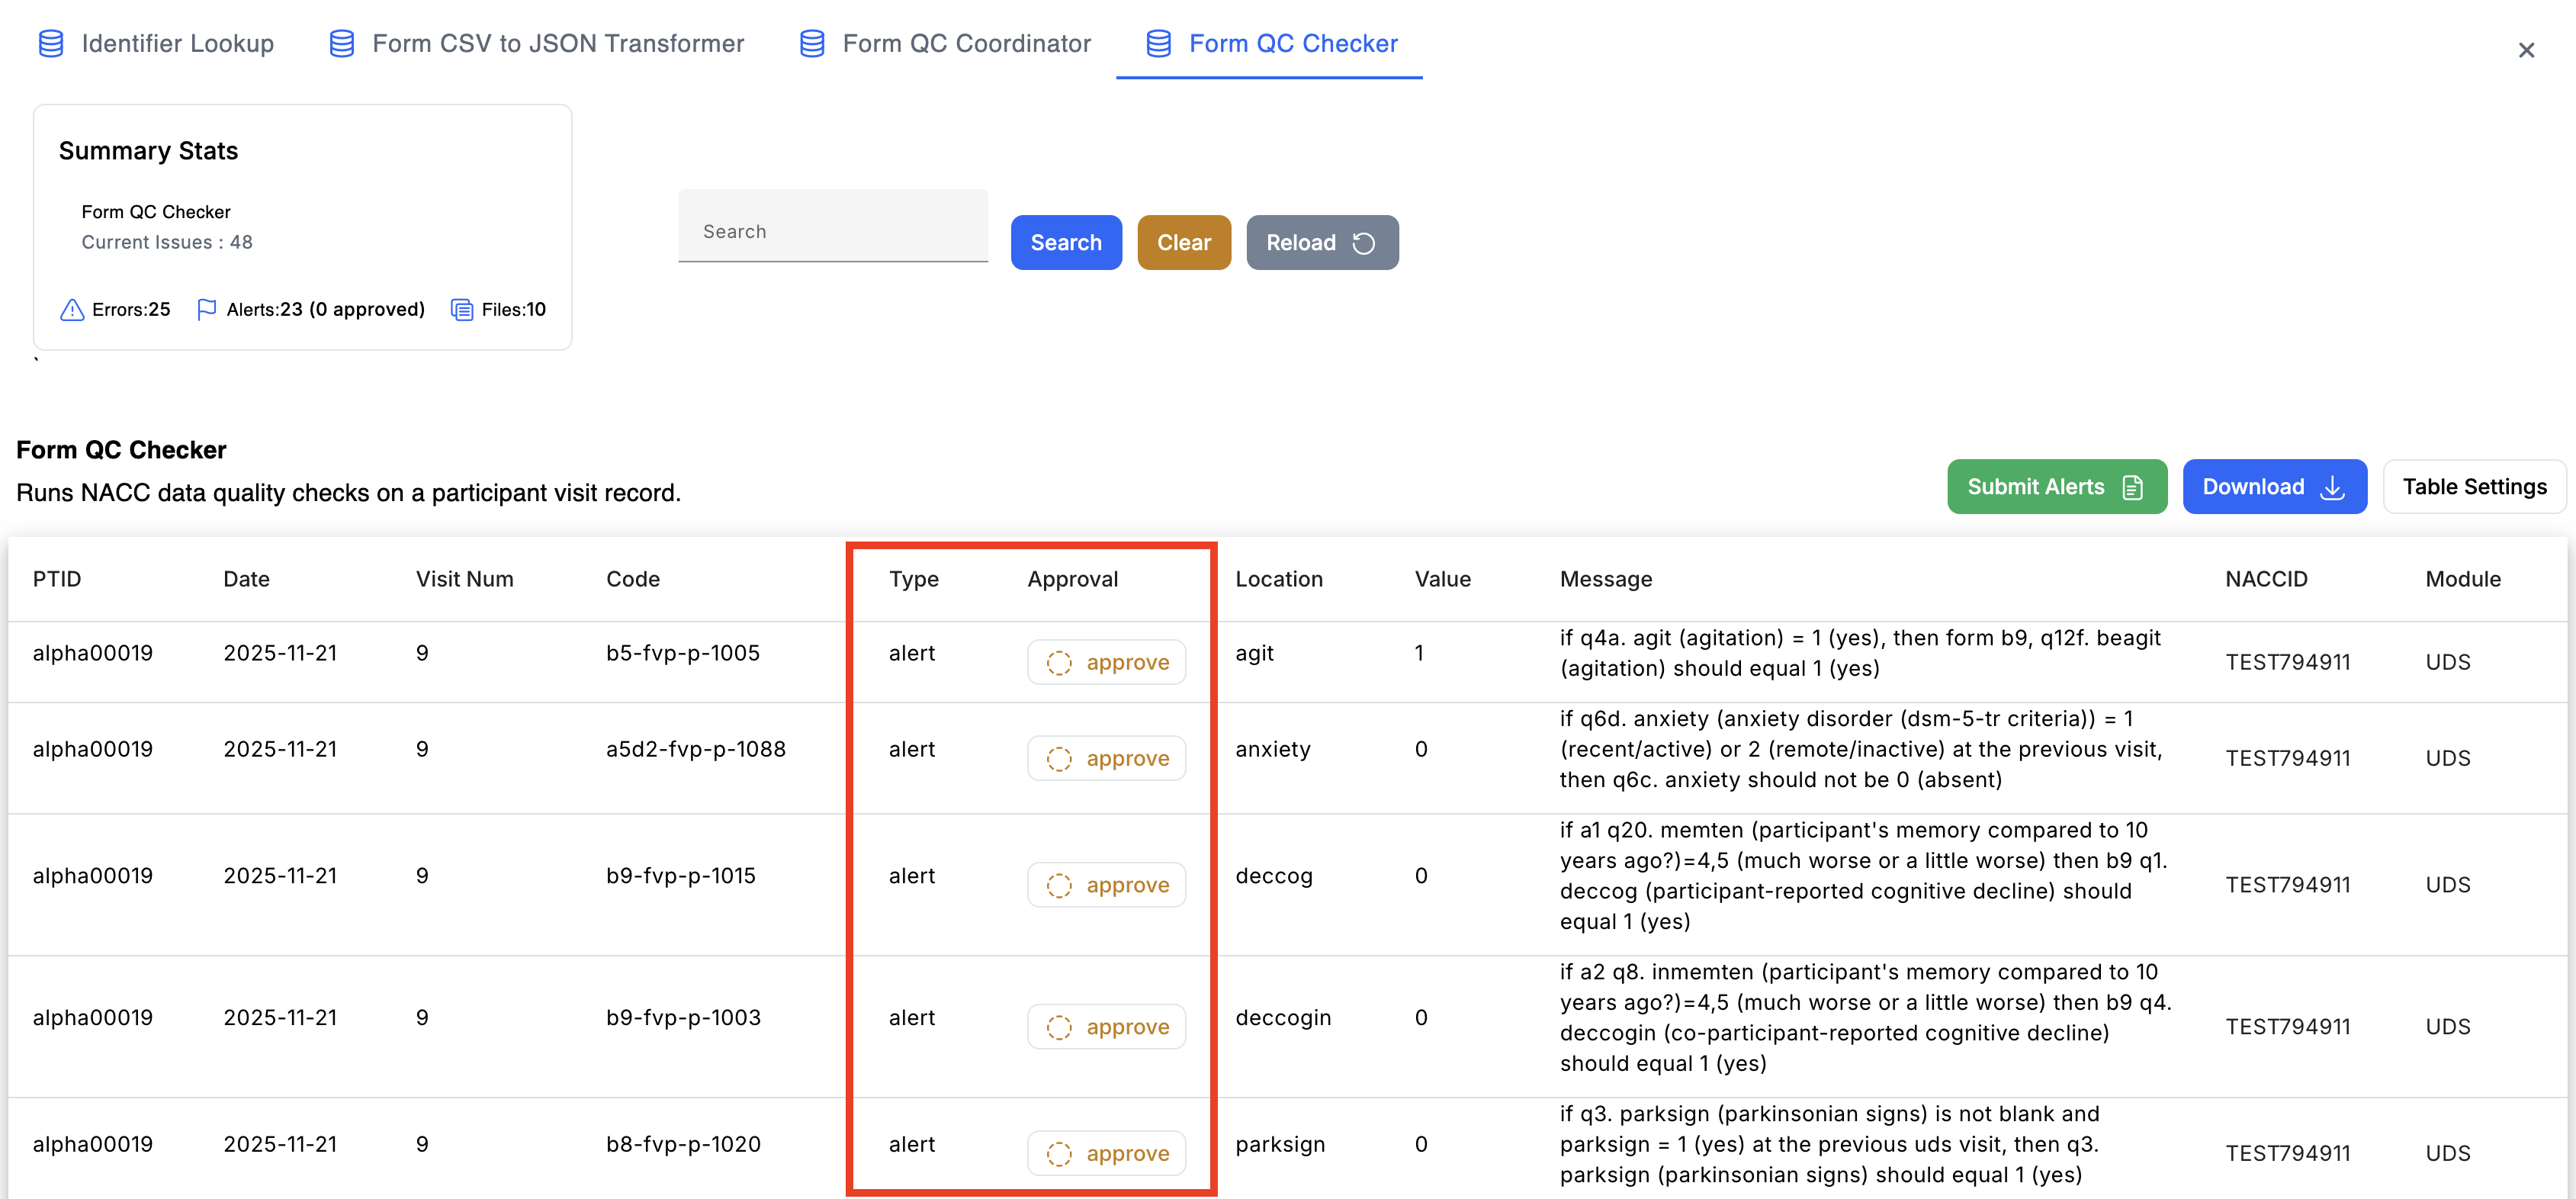
- Each alert can be approved by clicking the orange "approve" button under the
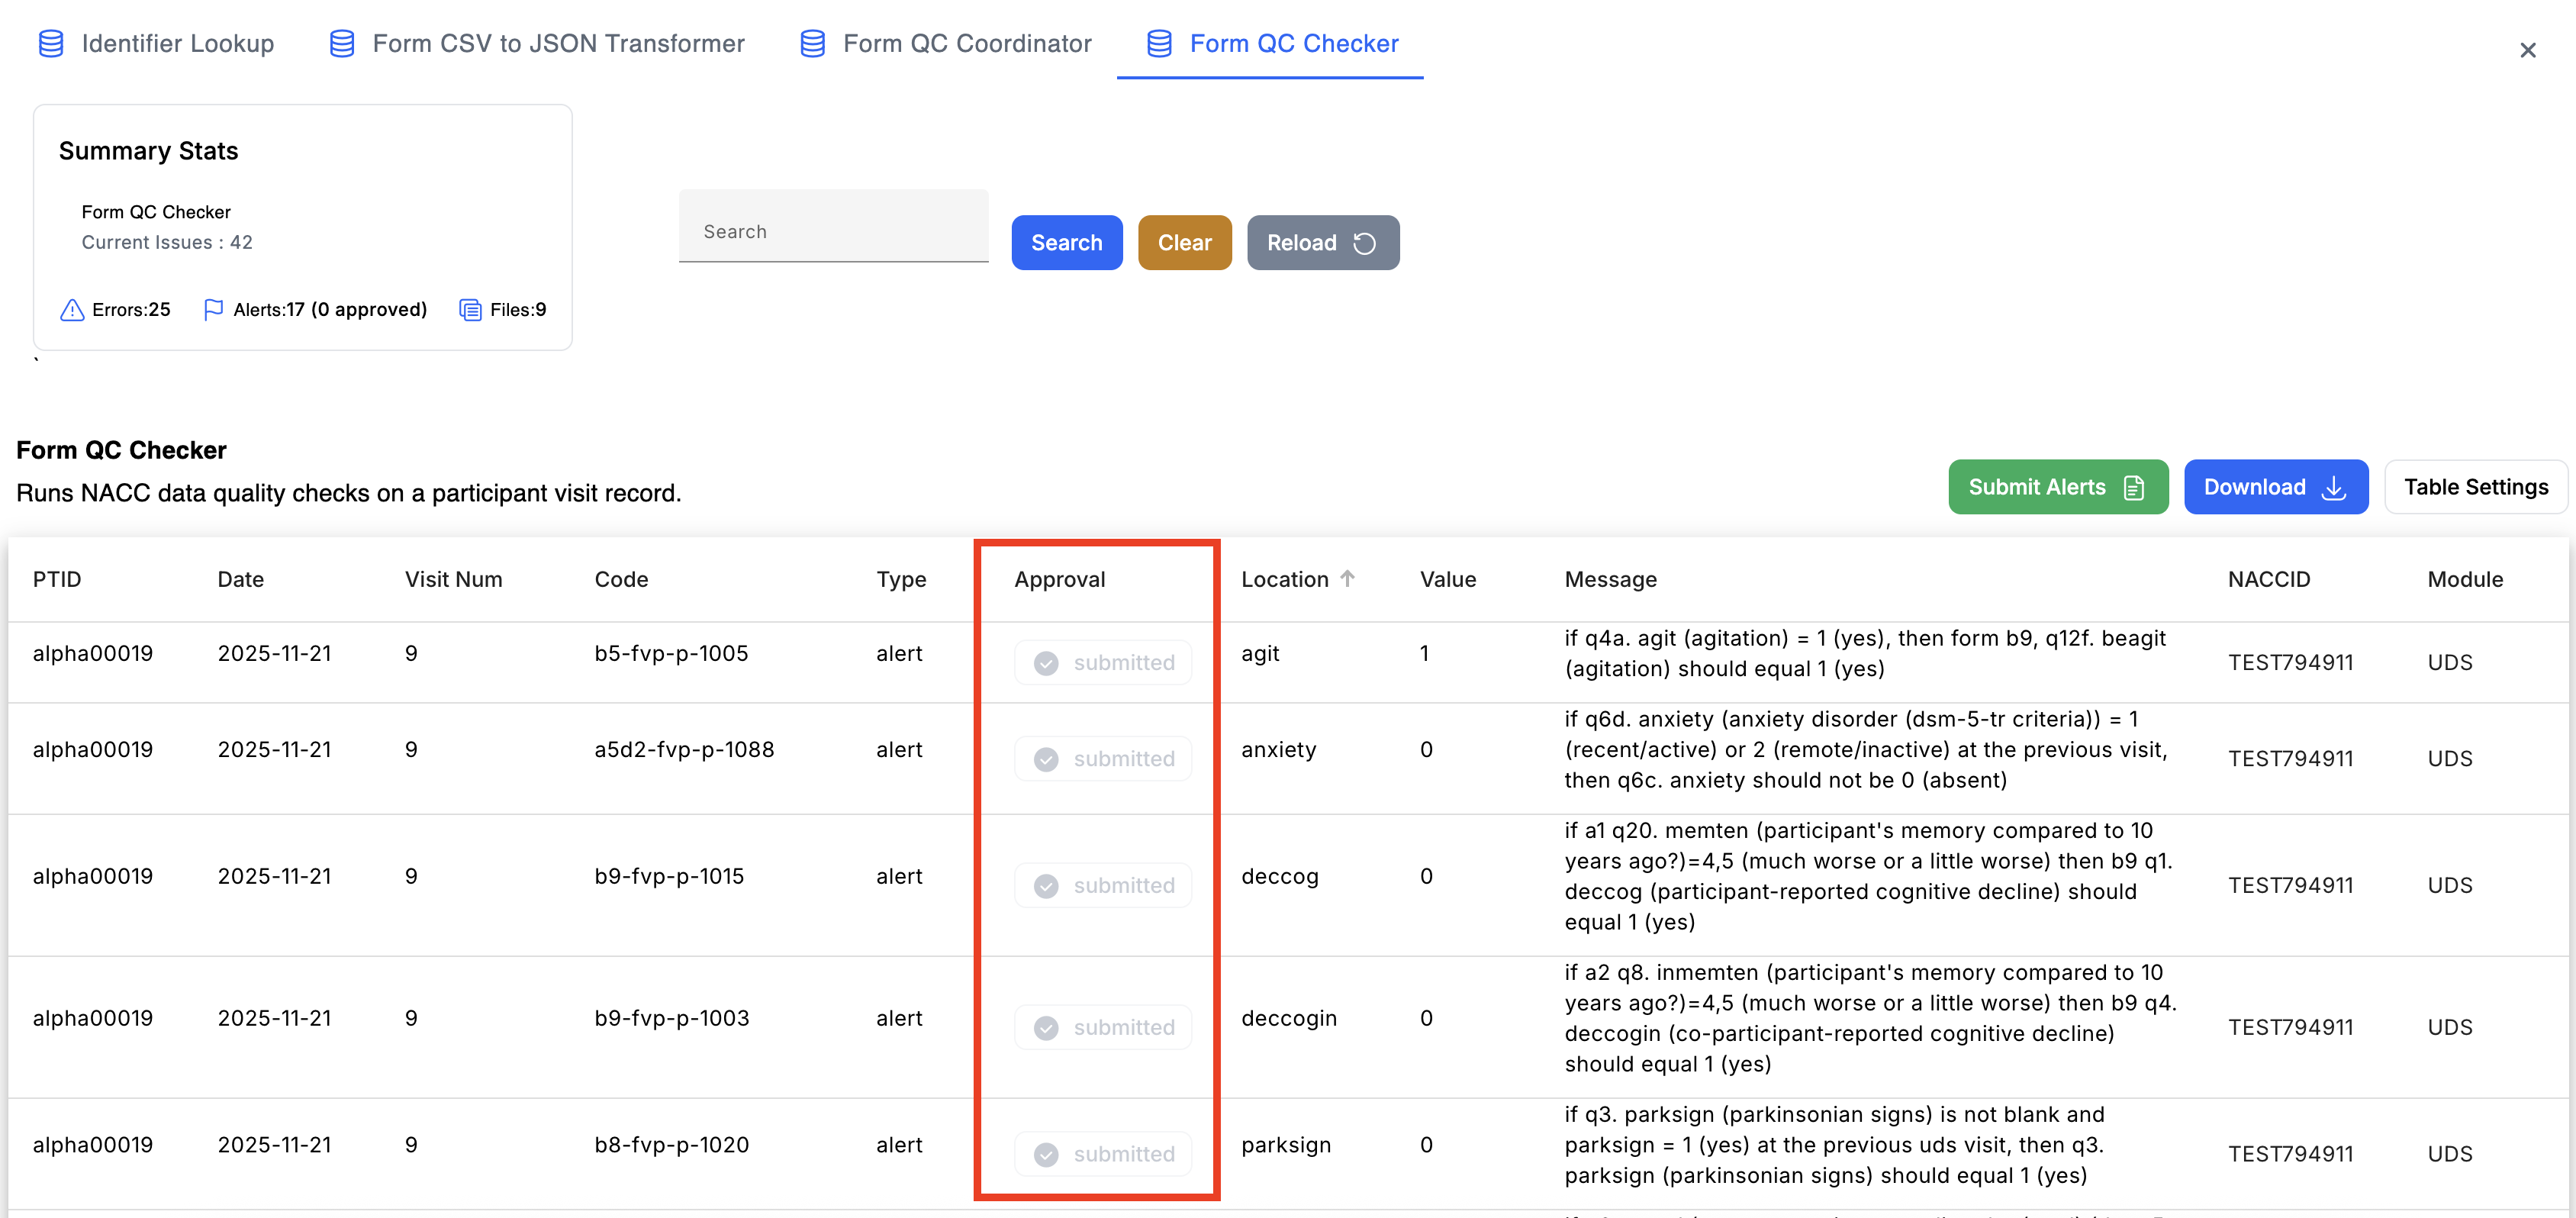
Approvalcolumn. This should only be done after the alert has been inspected and verified to be okay, otherwise it will need to go through the same correction process as errors.
- Once an alert is approved, it will turn into a green "reset" button. You can reset an approval by clicking on it, and it will revert to the original state.
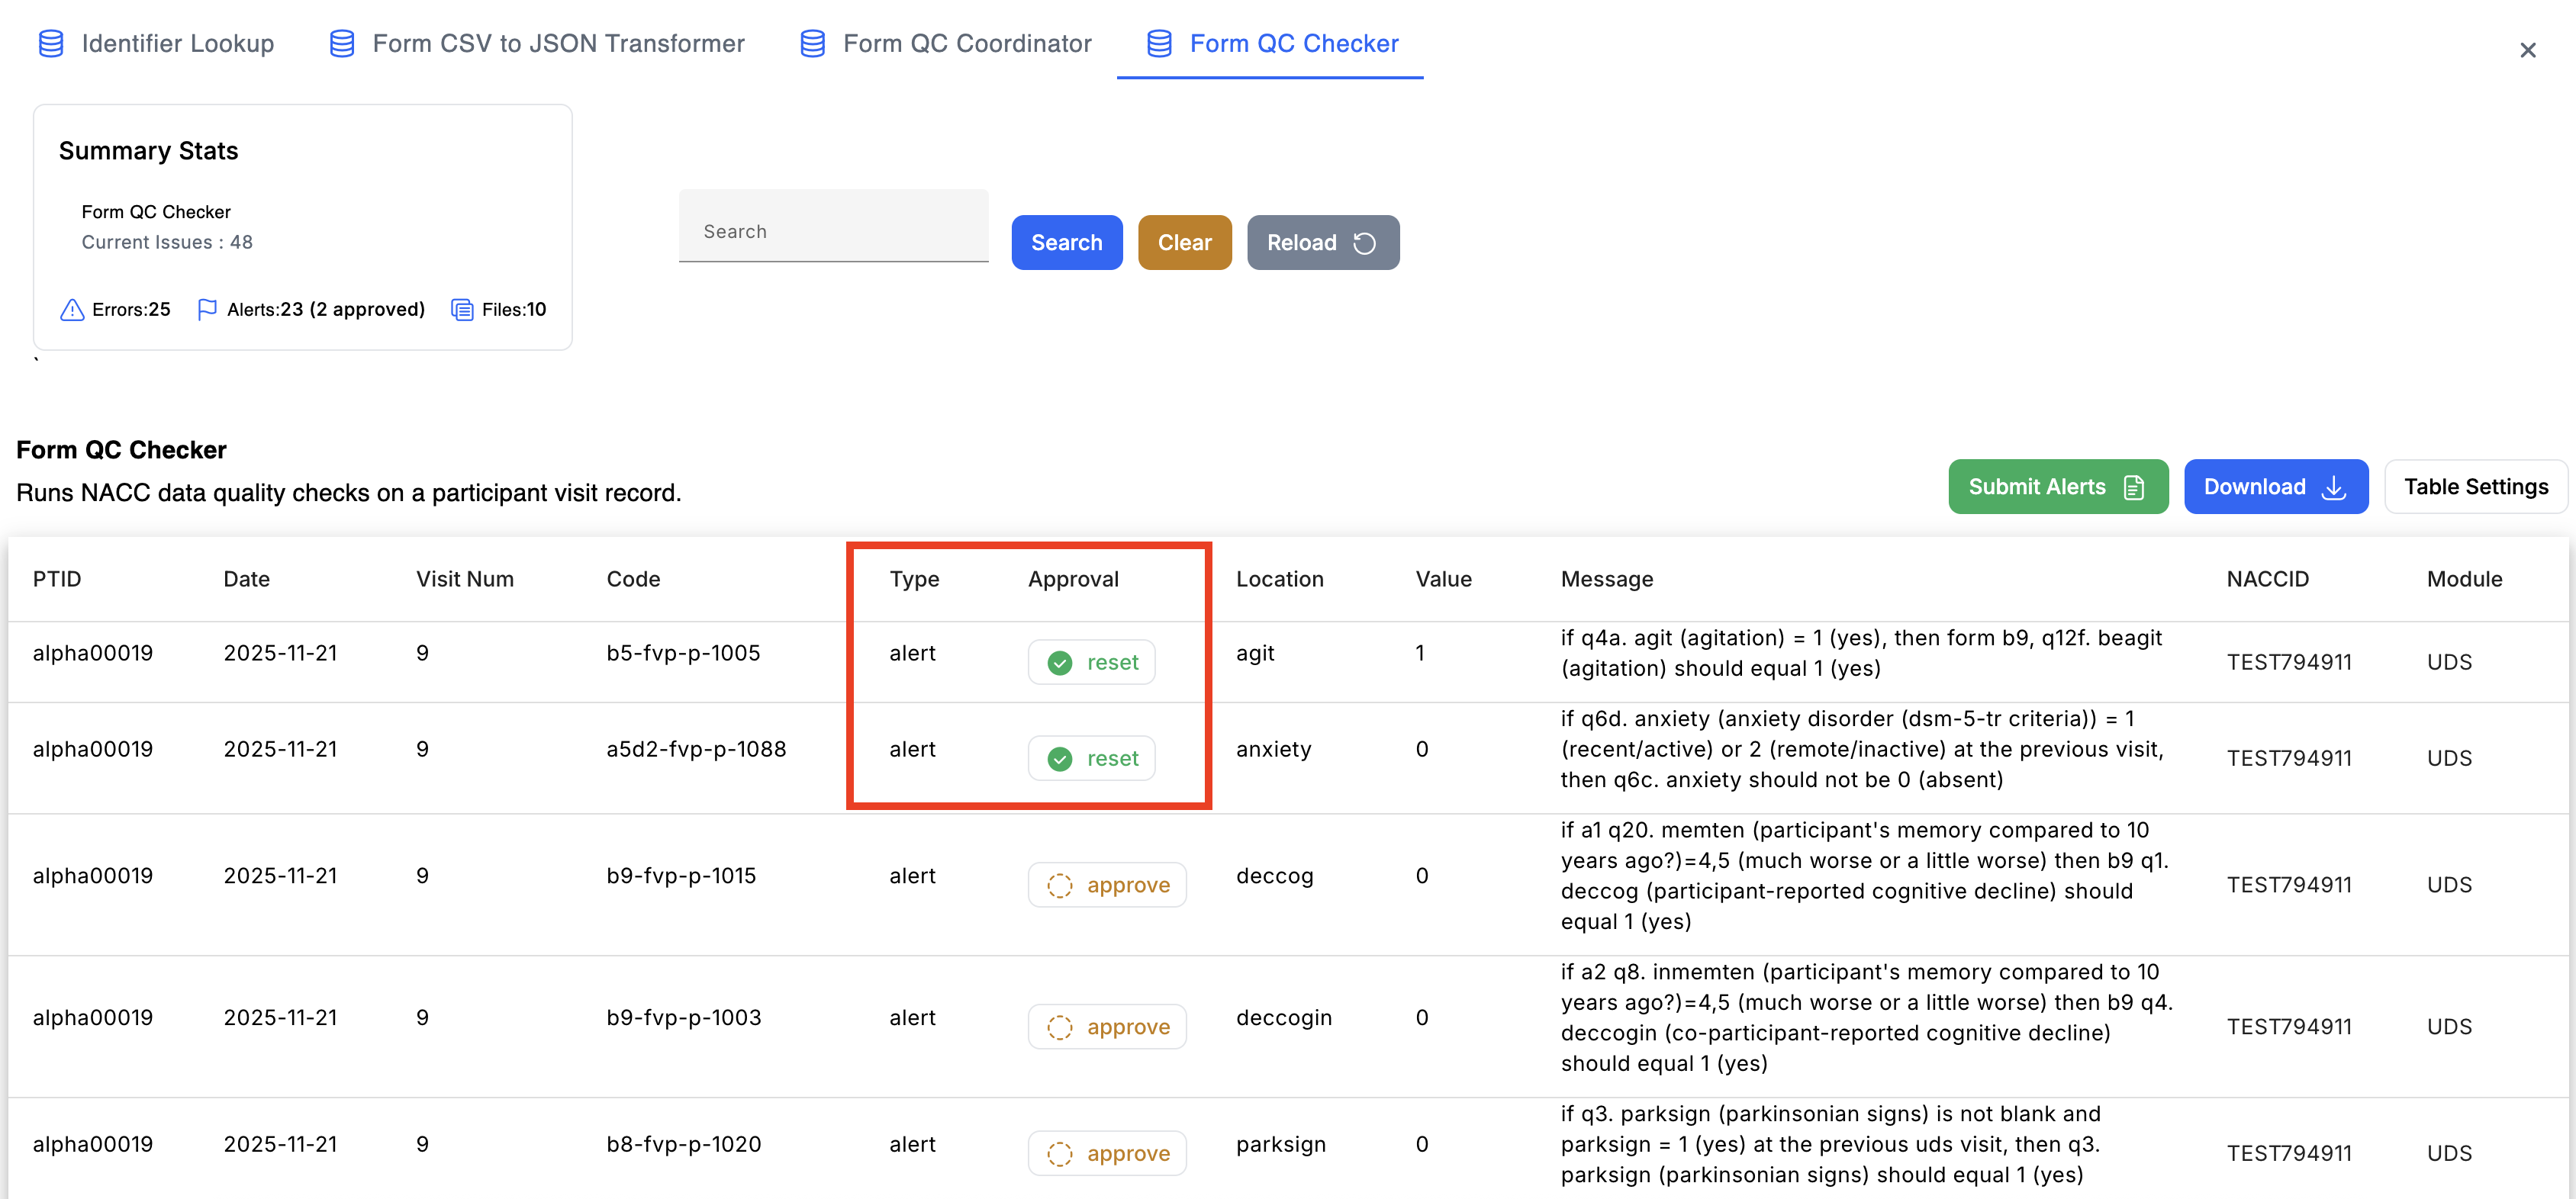
- After all alerts have been approved, the visit is ready to be submitted. Click on the green "Submit Alerts" button.

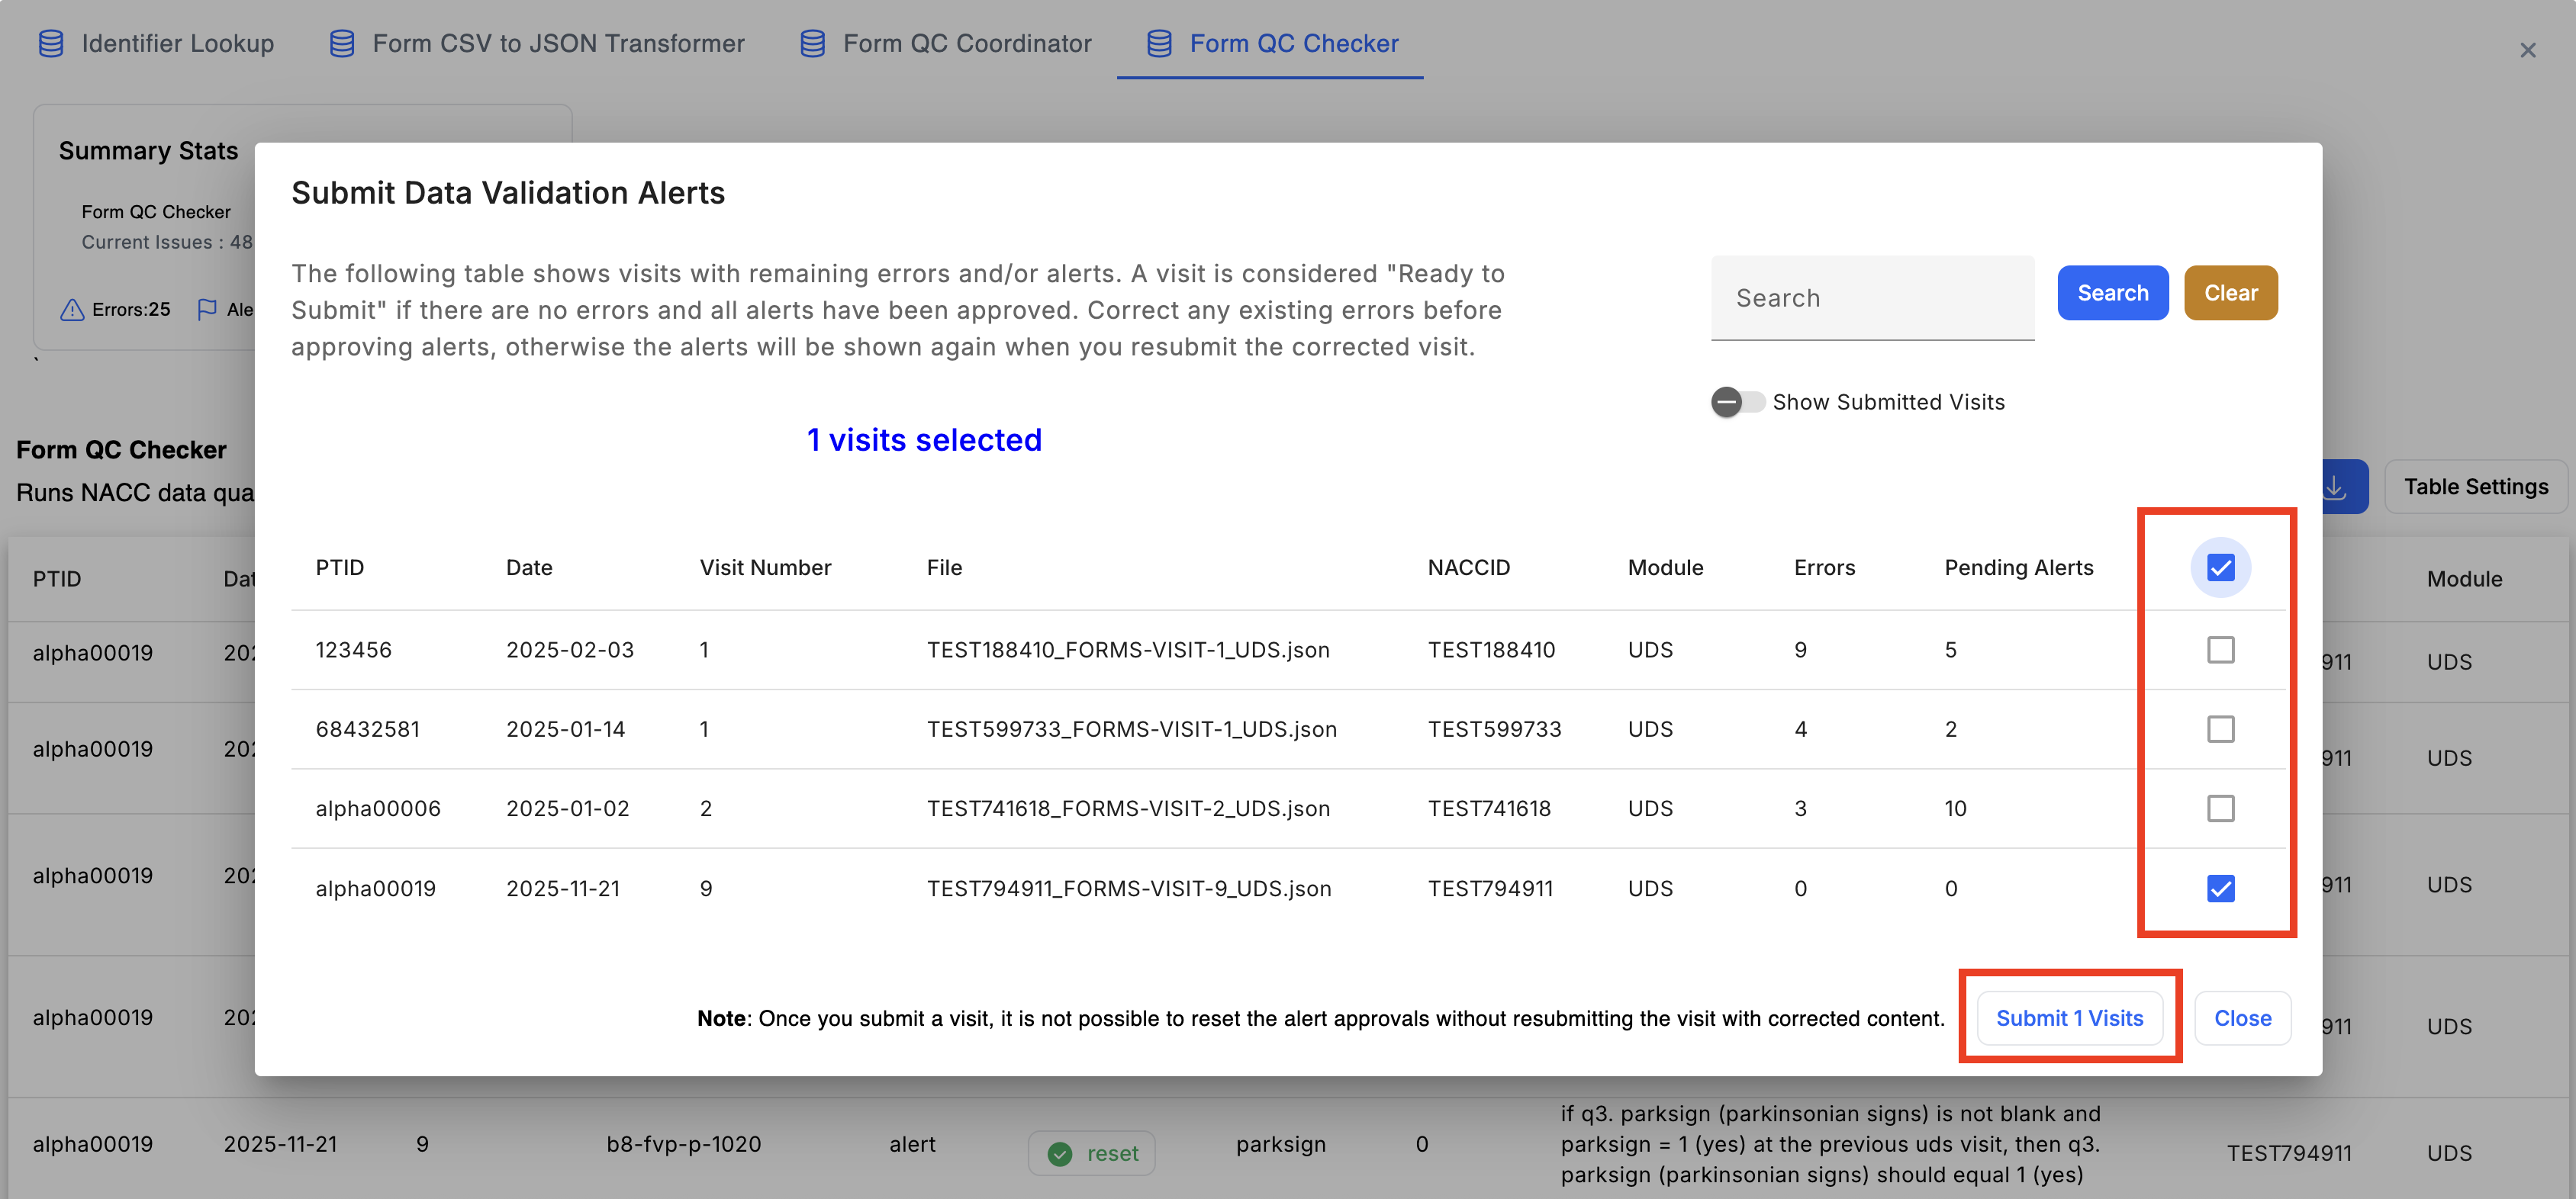
- This will open the "Submit Data Validation Alerts" dialog, which displays each visit and its remaining errors and/or alerts. A visit is considered "ready to submit" when there are no errors and all alerts have been approved. Otherwise, the checkbox will be disabled until the errors/alerts are fixed and approved.
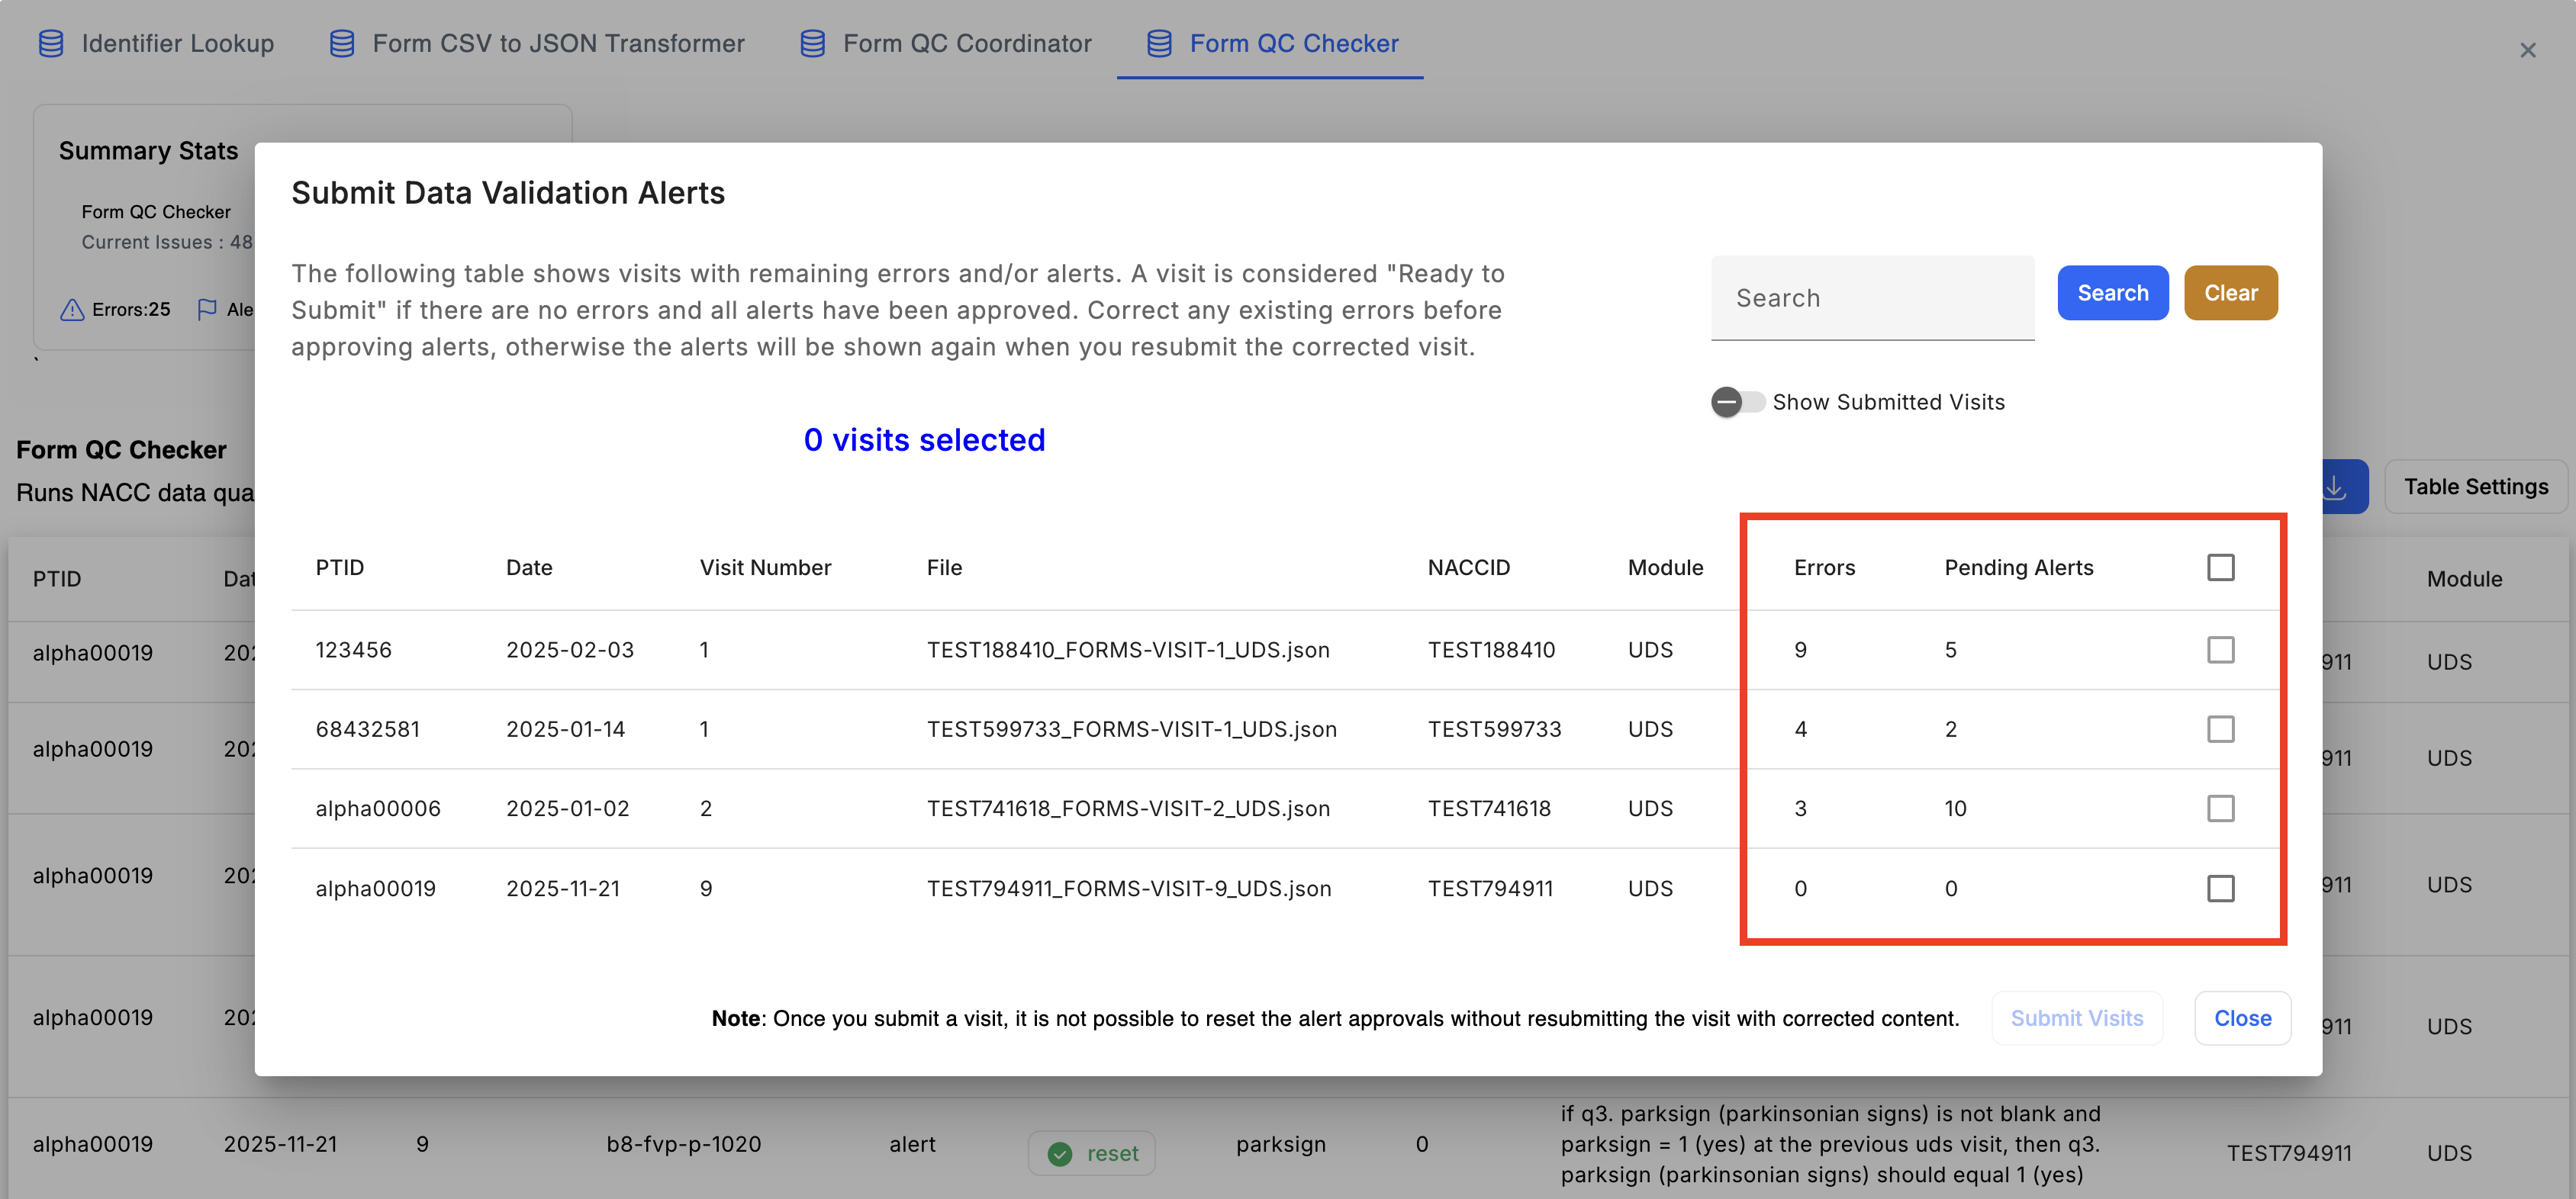
- When you are ready to submit a visit, click the checkbox for each visit you want to submit. You can also use the header checkbox to select all visits that are ready for submission. Then, click the "Submit X Visits" button.
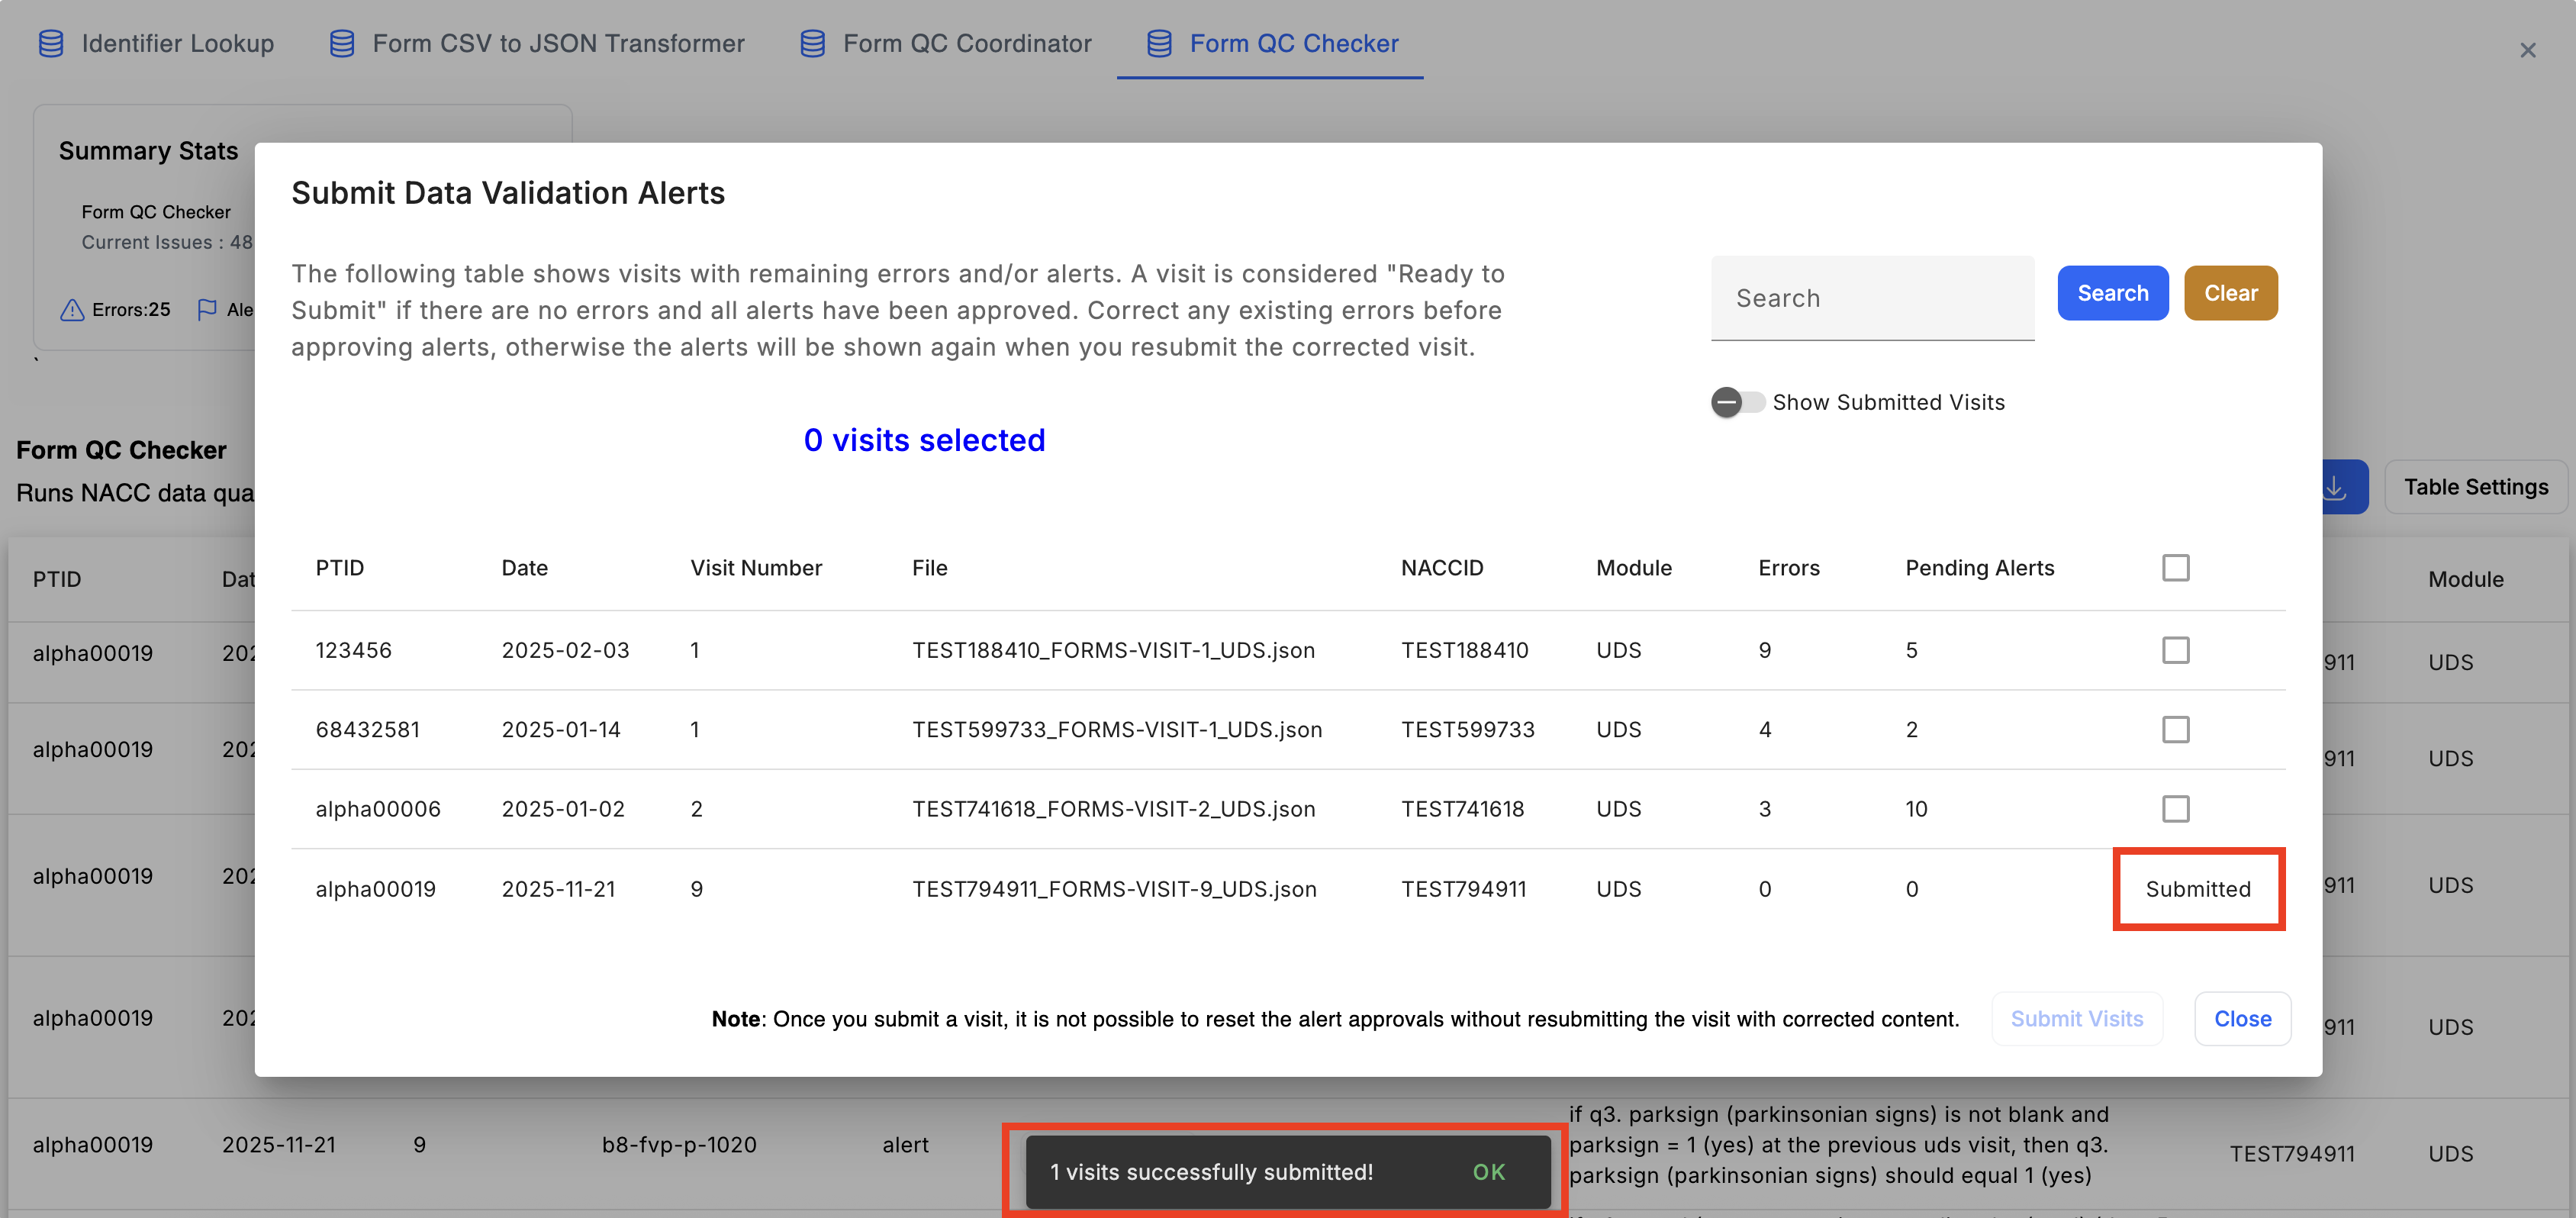
- Once the submission is complete, a dialog will appear at the bottom of the screen indicating whether or not the submission was successful. The corresponding visits will also be marked as "Submitted" if successfully submitted.
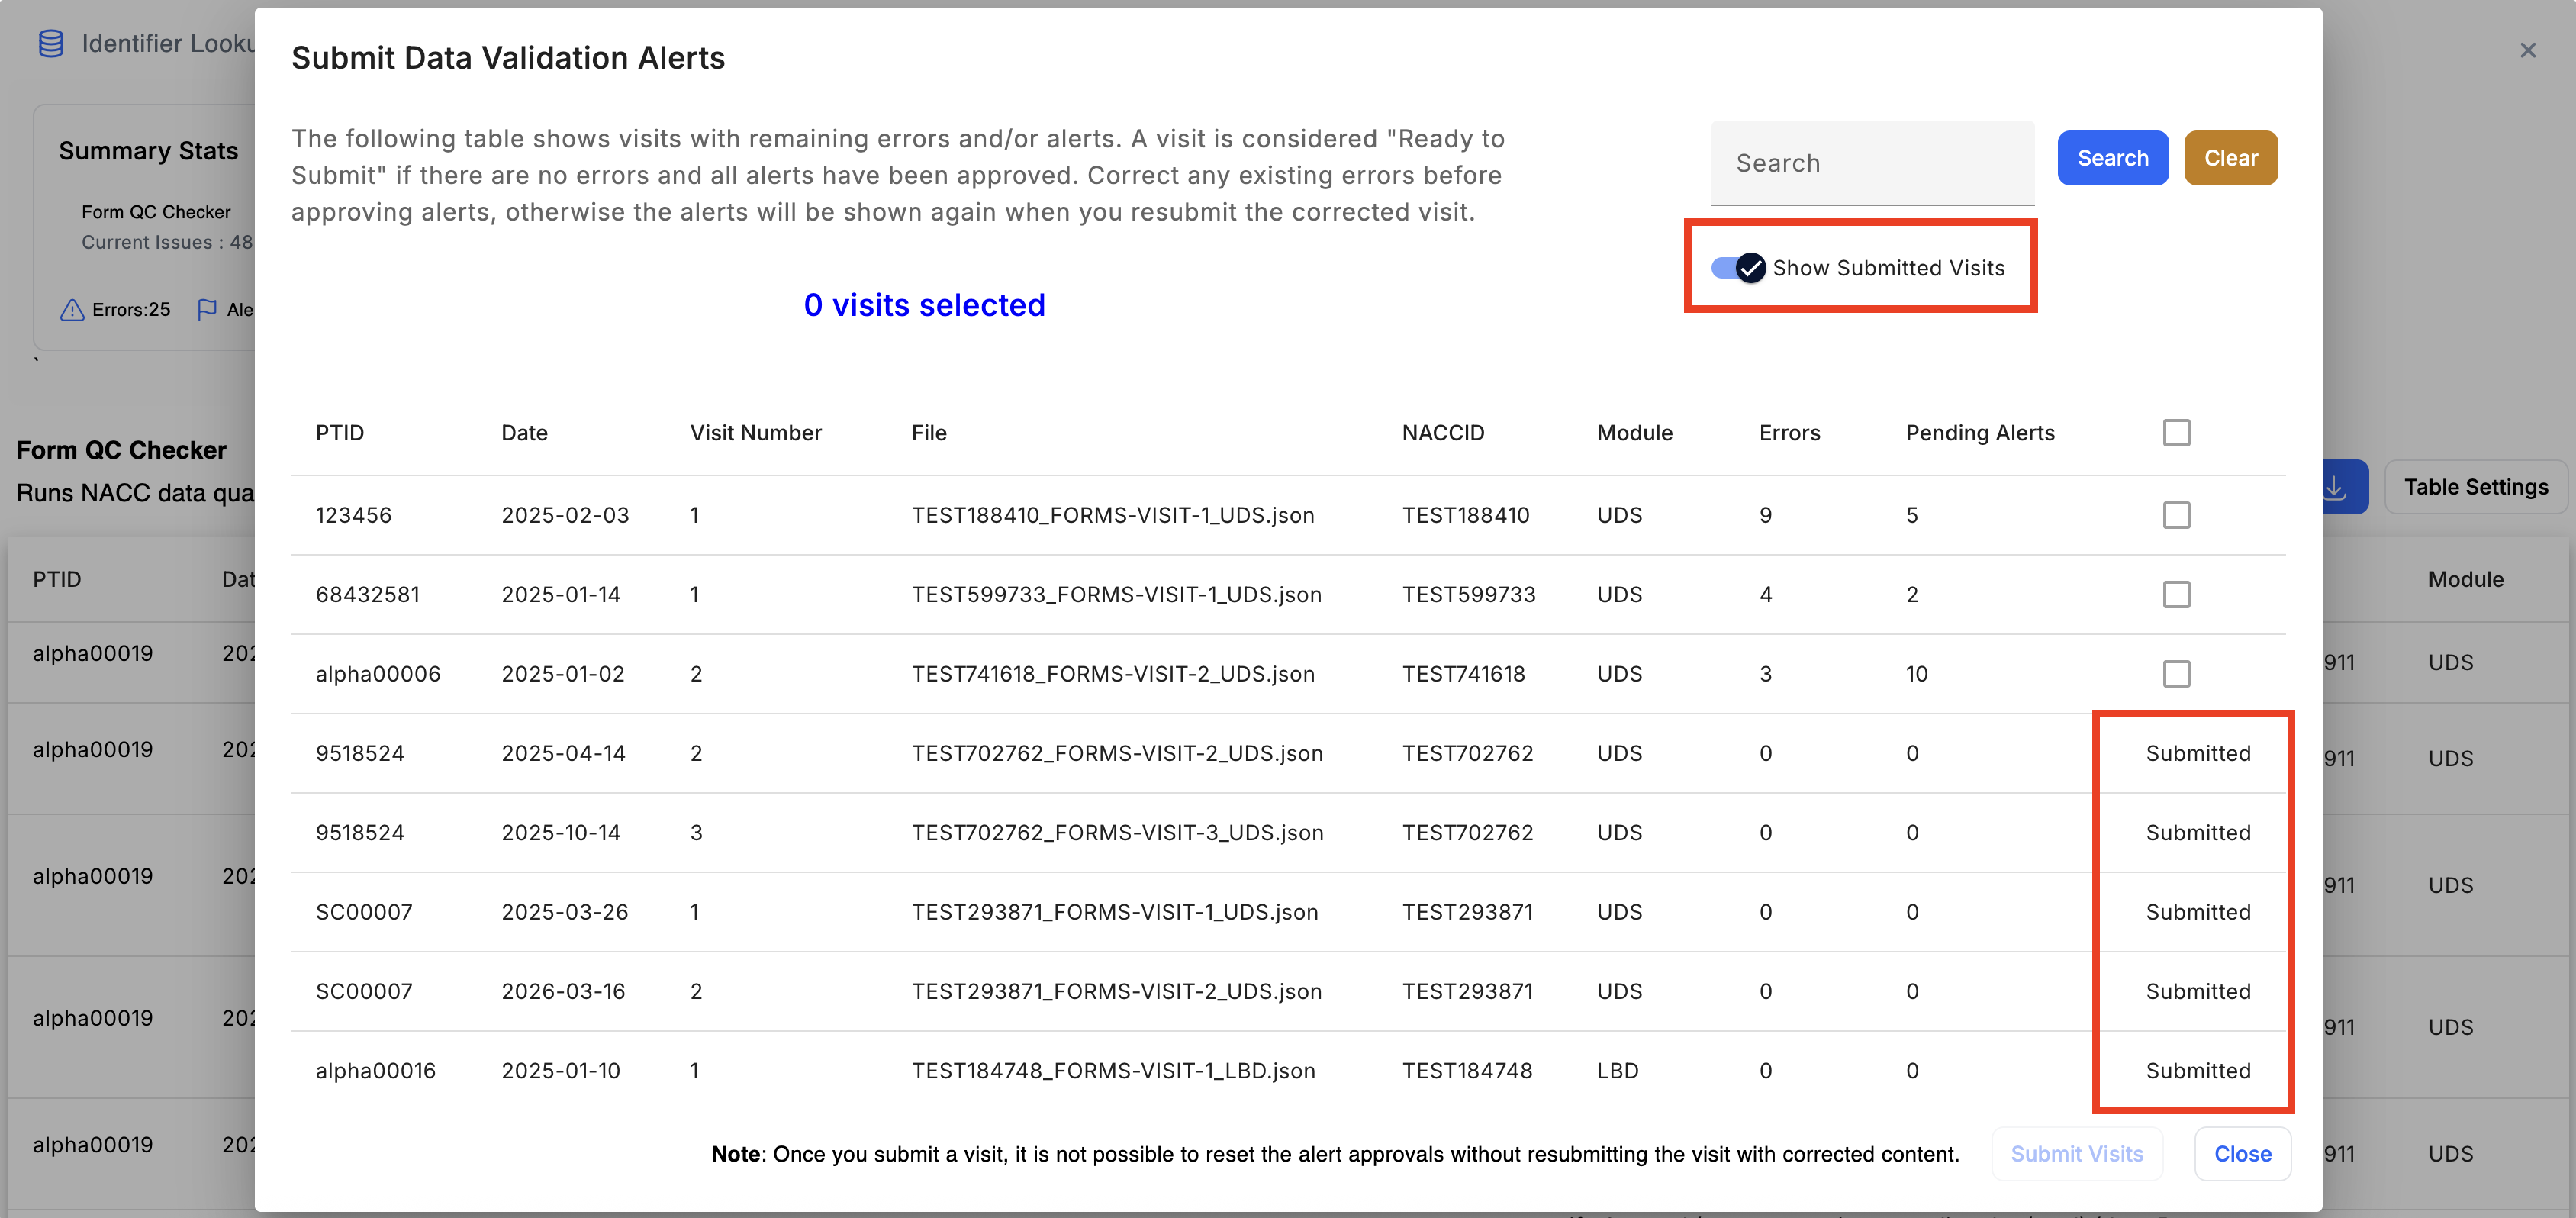
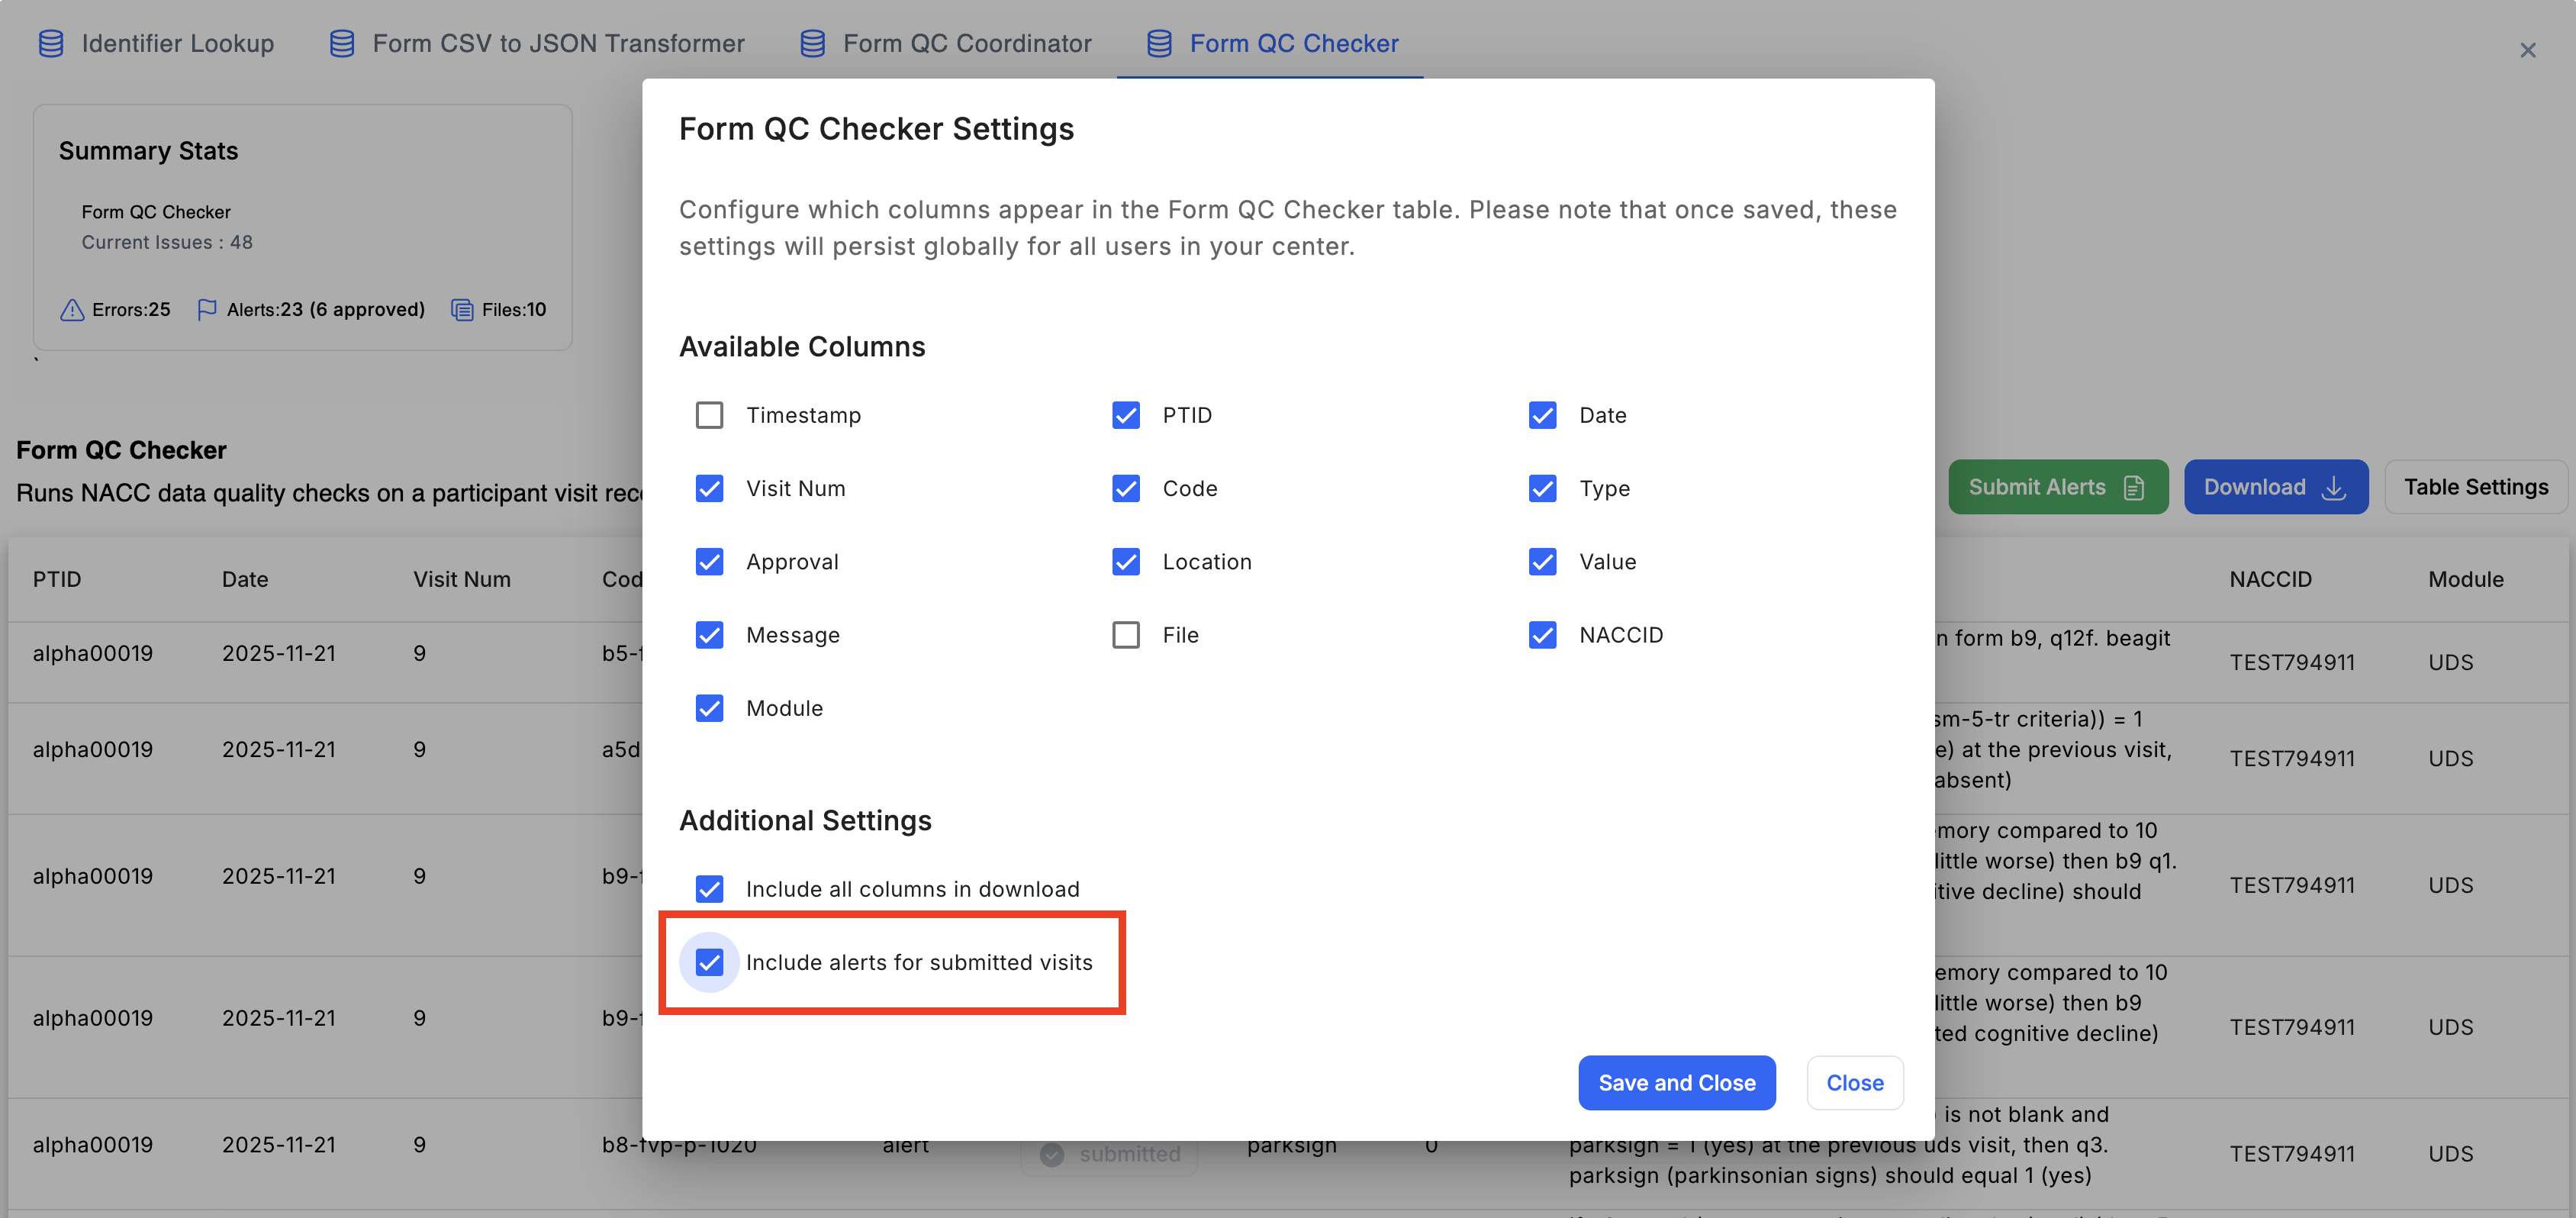
- Once a visit is submitted, you cannot reset its approvals without reuploading the visit with corrected/different content. You can still view submitted alerts by toggling the "Include alerts for submitted visits" option in the Table Settings Dialog. This setting will also cause submitted alerts to be included in the downloaded CSV file.
- To view submitted visits, open the "Submit Data Validation Alerts" dialog and enable the "Show Submitted Visits" toggle.