Affiliated Study Support
Audience
This documentation is meant for the staff of an affiliated study.
NACC systems and affiliated studies
NACC systems that make up the NACC Data Platform include
- the ADRC Portal that allows user to submit and access center data and general resources;
- the NACC Flywheel instance where data is managed and provides access to the ADRC Portal; and
- the NACC REDCap instance where NACC-hosted projects are hosted for centers.
Affiliated studies use the NACC Flywheel instance.
Getting Access
Access to NACC systems is managed through CILogon, which provides federated authentication.
CILogon supports logins for users at organizations that are part of the InCommon and EduGAIN organizations, which includes most ADRCs. Users who are not at one of those organizations must use ORCiD.
Please provide your NACC Project Manager contact with the name and email address for individuals who should have access to study data within the NACC system. We still need the information for an individual even if they are part of an ADRC and already have access to the ADRC Portal.
The process for adding users is similar to the process for ADRCs, however, a NACC staff member has to manually initiate each step. Affiliated study members will start with the first step: claim your registry record.
This process does involve automated emails that can be filtered by email systems. So, if at any point, it seems like emails are not showing up, please let NACC know.
Study ID
Each affiliated study is assigned an ID for the purposes of managing the data that is accessible to the study. This ID is generally the study name in lowercase, but NACC will let you know the ID when you are given access to the system.
The current list is
allftddlbcdvcidleadsvcog
Study resources
Each affiliated study has a Flywheel group with resources available to the study staff. If you have certain staff that should only be given access to some things, please let us know.
This group will contain the following projects
study-data- contains the raw data for your study participantssubmission-status- used to request status and error reports for participantssandbox- a project for practicing uploads
If your study manages the participants for centers that are not ADRCs, you will also have an ingest-enrollment project that you can used to submit enrollment/transfer form data on the centers' behalf.
Uploading/Downloading files
There are a few options for uploading and downloading files.
If you are simply uploading and downloading data, you may just want to use the Flywheel user interface.
Your group has a project named sandbox that can be used to gain experience with the Flywheel tools.
Using the Flywheel UI
Flywheel is built to work best in the Google Chrome browser.
Access Flywheel using this link: Flywheel Projects
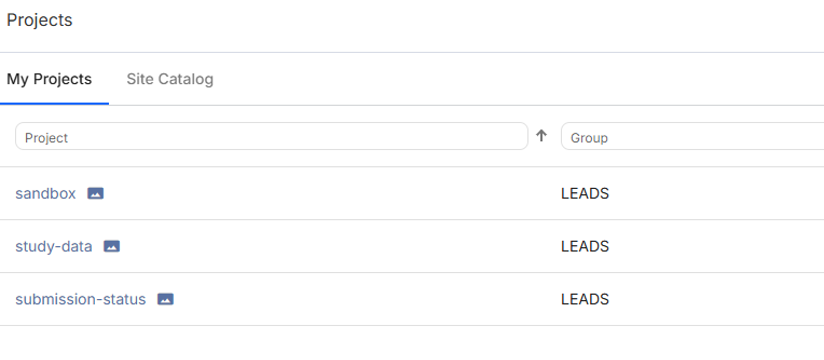
- When you open Flywheel, you are taken to the project page where you will see any projects accessible to you on the system.
- Note: If you don't see the project name you are looking for, you can use the search field at the top of the project column to find it (if you have permission to access it). For example, if you are a part of the LEADS group you might see a view like below.
1. Prepare your upload file
The project named submission-status can be used to pull either submission status or errors for form submissions as a CSV file. Please use the steps outlined here to first prepare your file for submission status OR errors.
2. Open the relevant project in Flywheel
Click the link for the project you want to work in. For example to view the submission status or errors use the submission-status project.
3. Upload the file
To upload the file add the file as an attachment. Once the file is uploaded please give it 30-45 minutes before the next step. This will give the job time to finish running.
4. Download the file
To download a file, hover your mouse over the right side of the row for the file and click the "actions" menu. This is illustrated in the Flywheel file download documentation.
You will not see any data in your project unless you or someone else has done one of the steps above for pulling data.
Using the Flywheel CLI
Users who cannot install software on their computers should just use the UI or solicit help.
Note that the CLI will download all of the files in a project and cannot be used to download a single file.
Start by getting the Flywheel CLI tool.
When we use the CLI we often use a Flywheel "path" that looks like either
fw://<group>/<project>to reference a project, orfw://<group>/<project>/<file>to reference a file.
For group you will substitute the study ID for your study, while project and file will depend on context.
Note: For the examples, we are going to use a study ID named study-group but you want to know the study ID for your study and substitute it for study-group in the commands below.
-
To upload a file
test-upload.csvfrom the directory containing thetest-upload.csvfile run the commandfw upload test-upload.csv fw://study-group/sandbox -
To download all of the files
fw download fw://study-group/submission-status/submission-status.csv <local-path>where
<local-path>is the path to the directory where you want to save the filesTo download a single file, you either have to use the Flywheel web interface, or use a python script.
-
List available files
fw ls study-group/submission-status
Using the Flywheel Python SDK
Flywheel provides a Python SDK that can be used for both uploads and downloads of files.
In addition, the demonstrations created for the ADRCs may be helpful, but reach out to your Project Manager contact at NACC if you need more help or information.
Note that any scripts you write will be limited to the projects within the study group.
Pulling form submission status and errors
Your group has a project named submission-status that can be used to pull either submission status or errors for form submissions as a CSV file.
Please let NACC know if you need submission status or errors for non-form data.
Process basics
Both use a process in which you upload a query file with participant information, a job runs to pull the status/error data, and a file is created for you to download.
The query file is a CSV with the following columns
adcid- the ADCID for the center. If a center uses a separate ADCID for participants in your study, you should use that ID instead of the center ADCID.ptid- the center-assigned participant ID
The query files may contain participant IDs from different centers.
This process is not immediate and can take a several minutes to complete.
Configuration options for status and errors
The following configuration options may be set for all runs:
- modules - UDS and other form modules to be included
- the name of the output file
- the study ID for your study
Submission status
To get a status report for UDSv4 submissions
- upload a query file named
"status-query.csv"tosubmission-status - download file named
"submission-status.csv"fromsubmission-status
This report contains the same information that is provided to each center for their participants, and each row indicates the status for each visit in a stage of the submission pipeline. Meaning there are multiple rows per visit.
A visit is successful once the QC checks have passed.
So, if you don't want to check that all stages have PASS status, you can look for the status of the stage named form-qc-checker.
Error status
To get an error report for UDSv4 submissions
- upload file named
"error-query.csv"tosubmission-status - download file named
"submission-errors.csv"fromsubmission-status
This report contains the same information provided to a center for their participants, and shows the details for each error.
Obtaining UDSv4 Data
Your group has a project named study-data that can be used to access the data submitted for your project.
It is initially empty.
You must request your study data in a similar process to that for submission status and error where you upload a query file, and a process starts automatically that pulls the participant data in the study-data project.
The data query file is a CSV with the following columns:
adcid- the ADCID for the center. If a center uses a separate ADCID for participants in your study, you should use that ID instead of the center ADCID.ptid- the center-assigned participant ID
The query file may contain participant IDs from different centers.
Configuration options for pulling data
The following can be configured to determine what happens during the copy process:
- whether to include pre- or post-QC data
- which form modules (UDS, etc. ) to include
- the name of the output file
Requesting a data update
- create a query file named
"data-query.csv". - upload the query file
"data-query.csv"tostudy-data. (The file name is used to trigger the copy process.) - download the file
"study-data.csv"from thestudy-dataproject.
Managing Enrollment
Your group has a project named ingest-enrollment.
It is possible for you to manage enrollment for centers that are part of your study. However, be aware that it uses the same process that is accessible to each center.
This process uses data for the enrollment transfer form.
- create a file
"enrollment.csv"using the CSV format for the enrollment/transfer form linked above, with columns matching the header names in the Data Element Dictionary. - upload
"enrollment.csv"toingest-enrollment
This will split the enrollment file by center, and then submit each sub-file to the enrollment pipeline for the center. The enrollment file may contain participant data from different centers.
You can get the status and error reports for enrollment submissions by creating a query file "status-query.csv" or "error-query.csv" with the following columns:
adcid- the ADCID for the centerptid- the center-assigned participant ID
Upload the query file to the ingest-enrollment project.
Adapting/extending general capabilities
It is possible to extend the general processes described in this document. Reach out to your NACC Project Manager contact to discuss options.
Customizations that can be made without new software development include:
- Change the file name required for a particular action; either the whole name or allow for matching a file name pattern
- Change how participants are identified in the query files to use only NACCID